Introduction
In the not too distant past, if you wanted to run code at regular intervals you had a few go-to options to choose from. If you wanted a “down and dirty” solution, a quick PowerShell script could be scheduled using the Task Scheduler. If you needed anything more advanced or formal, you could write a Windows Service to house both the logic and the scheduling for unattended execution. In the age of cloud computing you may think of firing up an Azure Virtual Machine to accomplish the same tasks, but without needing an on-premise server always running. But why maintain an entire machine for code that needs to run once a day, or even once an hour? Fortunately, Microsoft has provided a flexible, easy to use solution for this type of task in the form of Timer Trigger functions within Azure Function Apps.
Azure Functions let you write the code to perform your task, without worrying about the infrastructure that runs it. Depending on the trigger type, there are different languages available to code your logic, including C#, PowerShell, TypeScript, and others. Regardless of which you choose, you get a powerful browser-based user interface with which to write, configure, and monitor your code.
In my case I was looking to create an automated daily check to see who didn’t complete their timesheets for the prior business day, sending an email with the list of offenders should any exist. We use Project Online to track daily hours, so I wanted to directly pull from that data using the OData reporting interface to make the determination. Before running through these steps in your own environment, be sure you understand Azure pricing models. The solution described here costs pennies per month, but that could change based on total usage, subscription plans, or future changes to the pricing models.
Getting started
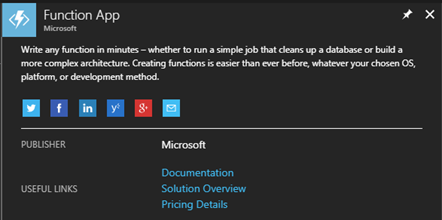
To get started, navigate to portal.azure.com. In the portal, click on the “All resource” navigation link where you will see everything associated with your instance. To create a new Function App, click on the Add button in the ribbon. This will bring up a list of everything available in the Azure Marketplace. In the search box, search for and select “Function App”, which should bring up the description, publisher, pricing, and documentation panel for the app.
Press the Create button to get started. You will first be presented with a list of general options for your function app.
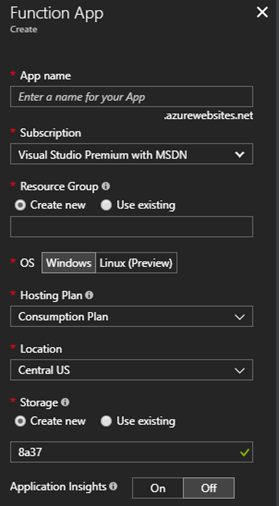
Notes:
- The app name must be globally unique, so you may want to preface it with your company or product name
- Be sure to read up and understand Resource Groups, Storage accounts, Locations, and the difference between Consumption Plan and App Service plan, as they can have a drastic impact on the charges incurred
Once you have setup the basics of the Function App, it is time to add an actual function. As of this writing, there are 33 different triggers to choose from! For our case we will use the Timer Trigger.
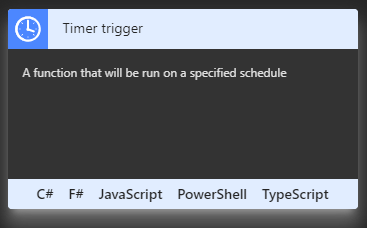
Add the Timer Trigger by finding the Timer trigger card and clicking on a language choice, such as C#. You will then be prompted for a name and a Timer trigger schedule. Don’t worry if you don’t understand cron expressions; there are plenty of examples and documentation within the designer. For our daily job, we use the expression “0 30 14 * * 1-5”, to specify Monday through Friday at 2:30 PM UTC (9:30 AM Eastern).
Setting up
You should now be in the designer, with the file “run.csx” open. This will be the main entry point for your function. The default template will provice a Run method that passes in the time and a TraceWriter for logging purposes. Before we get too far along here, we need to think about what other libraries we want to use in order to gain access to SharePoint Online and the Project OData endpoints. To do this, expand the “View Files” pane on the right and select the “project.json” file. This is the “package reference” used to tell NuGet which packages to retrieve for your project. A reference can be found at https://docs.microsoft.com/en-us/nuget/archive/project-json. For this project, we are using the SharePoint Online CSOM library and the Newtonsoft Json library. Our library file will look like this:
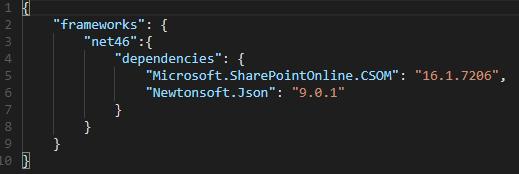
This will implicitly create a project.lock.json file with all of the details regarding the individual assemblies brought into our application.
We’ll also want to add a few application settings for our mail configuration, rather than having them directly within the code. Application Settings can be configured by going to the top-level node of your function in the tree view, and selecting the “Application settings” tab. You can add, edit, or delete your settings in the Application settings section of that page, to be referenced within your code as needed.
On to the code!
Our code will start with our using statements, as well as some configuration data we’ll pull from application settings and/or hard code as desired.
using System.Text;
using System.Threading;
using System.Threading.Tasks;
using System.Net;
using System.Net.Mail;
using Microsoft.SharePoint.Client;
using Newtonsoft.Json;
// Mail server configuration
private static string mailHost = ConfigurationManager.AppSettings[“MailHost”];
private static int mailPort = Convert.ToInt32(ConfigurationManager.AppSettings[“MailPort”]);
private static string username = ConfigurationManager.AppSettings[“EmailUsername”];
private static string password = ConfigurationManager.AppSettings[“EmailPassword”];
private static string toAddress = ConfigurationManager.AppSettings[“ToAddress”];
// Mail message constants
private const string mailSubjectTemplate = @”Missing Hours for {0}”; // {0} = Date
private const string mailBodyTemplate = @”<h3>The following people were missing hours yesterday…</h3>{0}”; // {0} = List of users
// API constants
private const string pwaPath = @”https://timlin.sharepoint.com/teams/projects/PWA/”;
private const string pwaApiPath = @”_api/ProjectData/”;
Next up, we construct a Url to use to retrieve the prior day’s time. This call will use the TimesheetLineActualDataSet data, selecting just the columns we need and filtering to a specific day. The date value will be a string template that we format in at runtime. I would recommend working the exact syntax out in your own environment via a browser to make sure you have it right.
// Templates for REST OData calls
private const string getHoursPwaRequestPathTemplate = @”TimesheetLineActualDataSet?$filter=TimeByDay%20eq%20datetime%27{0}%27&$select=ResourceName,ActualWorkBillable&$format=json”;
Next we create and initialize a dictionary to store the list of users we want to track.
// Dictionary of users to report on
private static Dictionary<string, double> userHours = new Dictionary<string, double>() {
{ “John Doe”, 0.0 },
{ “Jane Smith”, 0.0 },
{ “Hapie Goluky”, 0.0 },
{ “Joe Piccirilli”, 0.0 }
};
We also have a few “helper” functions to keep our main code clean.
// Get the prior business date
private static DateTime GetYesterday() {
var date = DateTime.Today;
switch (date.DayOfWeek) {
case DayOfWeek.Sunday:
date = date.AddDays(-2);
break;
case DayOfWeek.Monday:
date = date.AddDays(-3);
break;
default:
date = date.AddDays(-1);
break;
}
return date;
}
private static dynamic DeserializeJsonObject(string content) {
return JsonConvert.DeserializeObject<dynamic>(content);
}
private static void SendMessage(string subject, string body) {
var smtpClient = new SmtpClient();
smtpClient.UseDefaultCredentials = false;
smtpClient.Credentials = new System.Net.NetworkCredential(username, password);
smtpClient.Port = mailPort;
smtpClient.Host = mailHost;
smtpClient.DeliveryMethod = SmtpDeliveryMethod.Network;
smtpClient.EnableSsl = true;
var mailMessage = new MailMessage();
mailMessage.From = new MailAddress(username);
mailMessage.To.Add(new MailAddress(toAddress));
mailMessage.Subject = subject;
mailMessage.Body = body;
mailMessage.IsBodyHtml = true;
smtpClient.Send(mailMessage);
}
Reading the Project Online data uses .Net’s HttpWebRequest object, with SharePointOnlineCredentials providing the authentication mechanism. We encapsulate the credentials and the web GET calls with other helper properties and functions.
private static SharePointOnlineCredentials _creds;
private static SharePointOnlineCredentials Credentials {
get {
if (_creds == null) {
var securePassword = new SecureString();
foreach (char c in password.ToCharArray()) securePassword.AppendChar(c);
_creds = new SharePointOnlineCredentials(username, securePassword);
}
return _creds;
}
}
private static string WebGet(string requestUrl) {
var req = (HttpWebRequest)WebRequest.Create(requestUrl);
req.Credentials = Credentials;
req.Headers[“X-FORMS_BASED_AUTH_ACCEPTED”] = “f”;
var resp = (HttpWebResponse)req.GetResponse();
var receiveStream = resp.GetResponseStream();
var readStream = new StreamReader(receiveStream, Encoding.UTF8);
return readStream.ReadToEnd();
}
One final helper method constructs the call to WebGet.
// Get hours from PWA OData service for the prior business day
private static string GetHoursPwa(string date) {
return WebGet(pwaPath + pwaApiPath + string.Format(getHoursPwaRequestPathTemplate, date));
}
Within our main Run method, we orchestrate the overall logic. First, we get the date and log a message to know what date we ran for. These messages are visible in the Logs panel below the code window, and in the Monitor page accessible from the tree view navigation for all execution.
public static void Run(TimerInfo myTimer, TraceWriter log)
{
_log = log;
// Get yesterday’s date
var date = GetYesterday().ToString(“yyyy-MM-dd”);
_log.Info($”Running for {date}”);
Next we get and deserialize the data into a “dynamic” object.
// Get the PWA OData
var data = GetHoursPwa(date);
// Deserialize to a dynamic object
var dynamicObject = DeserializeJsonObject(data);
We’ll then iterate over the data in the dynamic object and aggregate the hours for each resource’s time entries into our dictionary.
// Populate our userHours dictionary based on hours in timesheet
foreach (var user in dynamicObject.value) {
if (userHours.ContainsKey(user.ResourceName.ToString())) {
userHours[user.ResourceName.ToString()] += Double.Parse(user.ActualWorkBillable.ToString());
}
}
We only need to deal with users with no hours, so we’ll use a quick Linq statement to extract them.
// Extract the names of users with 0 hours
var usersWithNoHours = userHours.Where(x => x.Value == 0.0).Select(x => x.Key);
Finally, we’ll send an email message out to our distribution list if there are any offenders or log the fact that all is clear if not.
// Send the message, if there are any users without hours
if (usersWithNoHours.Any()) {
var subject = string.Format(mailSubjectTemplate, date);
var body = string.Format(mailBodyTemplate, string.Join(“<br />”, usersWithNoHours));
_log.Info(body);
SendMessage(subject, body);
}
else
{
_log.Info(“No offenders found!”);
}
Wrapping up
Once the code is in place, the App is running, and the timer function is enabled, the code will wake up every day, run through the logic, and go back to sleep until needed again. As we have this configured, using a Consumption pricing tier, this once-daily execution costs less than $0.10 per month beyond any standard subscription costs. As stated before, your mileage may vary based on the specifics of your plan, number of calls, disk / data usage, etc., so be sure to research these items first and monitor your application within Azure to ensure your costs are in line with expectations.
Enhancing Nintex Forms with JavascriptNintex Forms provide an intuitive interface for designers to quickly create form-enabled solutions.
However, some scenarios require us to go beyond the out-of-the-box capabilities. For example, we recently had a requirement involving two lists and the need to read in rate information from a second list. The complexity was that if a specific date field changes in one list, the form would have to refresh the rate information dynamically without closing the form.
The purpose of this blog post is to provide one post that contains the information you need to effectively enhance your Nintex Forms using JavaScript.
How To Enhance Nintext Forms With JavaScripts
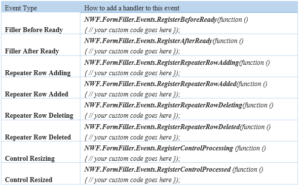
A Nintex Form is bound to both a SharePoint list and an associated content type within that list. To read from a second list requires the use of JavaScript. Form designers with JavaScript knowledge can now leverage the events shown below and are assured that their code runs safely as expected when these events occur during runtime. The following table summarizes the available events.
Embedding Custom JavaScript Within a Nintext Form
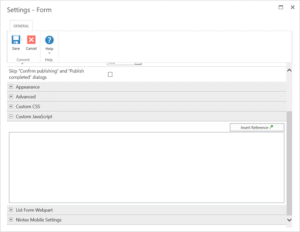
One of the simplest ways to include JavaScript within a Nintex form is to simply embed the JavaScript within the form itself. Within Form Settings, you will find a Custom JavaScript header under which you can include JavaScript. While this is a completely acceptable approach within the design of a single form, you may wish to consider using custom JavaScript includes if the JavaScript is to be reused.
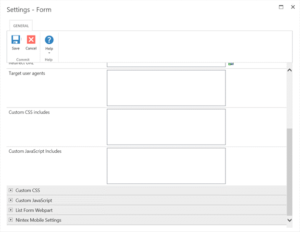
CUSTOM JAVASCRIPT INCLUDES
This setting is found in Form Settings within the Nintex Forms Designer and is used for including custom JavaScript files at runtime. These includes can use local includes from within SharePoint such as ‘/SiteAssets/example.js’ or external includes by simply adding the URL to the desired JavaScript file.
BUTTON ACTIONS
With Nintex Forms Designer, you can drop a Button control onto the Form. By right-clicking on the button control and selecting Settings you can choose to set the Button action to JavaScript. Additionally, under the Advanced header of the control settings you can provide the JavaScript to execute when a user clicks the button under the Client click setting
STORING CLIENT ID IN JAVASCRIPT VARIABLES
This option creates a JavaScript variable that references the Client ID of the form control and is used for allowing data processing between the Nintex Form and JavaScript. These settings are found under the control settings. To allow this to happen you must set Store Client ID in JavaScript variable to Yes and you must set a corresponding JavaScript variable name beside Client ID JavaScript variable name.
client_id_in_javascript.pngFORM CONTROLS AND CUSTOM VALIDATION FUNCTIONS
Nintex Forms allows for custom validation of form controls based on JavaScript. Within the form control settings under the Validation header, set Use Custom Validation to Yes and provide the relevant JavaScript within the Custom Validation Function setting.
form_controls.pngFILLER AFTER READY
By default, a Nintex form will focus on the first enabled input control on the form. However, now you can switch the focus to a specific control using JavaScript. We have demonstrated with the examples below:
Set initial mouse cursor focus in the Single Line Text Control
1. Open the Nintex Forms designer and drag a Single Line Text control onto the canvas.\
2. Click on the control and locate the CSS class field in the Ribbon. Type ‘singlelineFocus’.

3. Click on the Nintex Forms tab, and click on the Settings button in the Ribbon.

4. Expand the Custom JavaScriptsection, and enter the following code:
NWF.FormFiller.Events.RegisterAfterReady(function ()
{
NWF$(‘.singlelineFocus input.nf-associated-control’).focus();
});
Click Save and then publish the form. When you add a new item, you should notice that the initial focus of the form has changed, and it is now occurring in the Single Line of text control
Set initial mouse cursor focus in the Date/ Time Control
1. Open the Nintex Forms designer and drag a Date/Time control onto the canvas.
2. Click on the control and locate the CSS class field in the Ribbon. Type ‘datetimeFocus’.
3. Click on the Nintex Forms tab, and click on the Settings button in the Ribbon.
4. Expand the Custom JavaScript section, and enter the following code:
NWF.FormFiller.Events.RegisterAfterReady(function ()
{
NWF$(‘. datetimeFocus input.nf-date-picker’).focus();
});
Click Save and then publish the form. When you add a new item, you should notice that the initial focus of the form has changed, and it is now occurring in the Date/Time control.
Set initial mouse cursor focus in the People Control
1. Open the Nintex Forms Designer and drag a People control onto the canvas.
2. Click on the control and locate the CSS class field in the Ribbon. Type ‘peopleFocus’.
3. Click on the Nintex Forms tab, and click on the Settings button in the Ribbon.
4. Expand the Custom JavaScript section, and enter the following code:
NWF.FormFiller.Events.RegisterRepeaterRowAdding(function () {
var repeaterControl = NWF$(arguments[0][0]);
if (repeaterControl.hasClass(‘expensesRepeater’)) {
}
});
Click Save and then publish the form. Add a new item, and click on Add New Row to add another row to the repeating section. A message should appear at the top of the form informing you that you are about to add a new entry. When you click OK on the message, the new row should will be added.
Repeater Row Added
You can trigger this event when you want to inform the user that a new row has been added to the repeating section.
1. Open the designer and drag a Repeating Section control onto the canvas.
2. Click on the control and locate the CSS class field in the Ribbon. Type ‘expensesRepeater’.
3. Click on the Nintex Forms tab, and click on the Settings button in the Ribbon.
4. Expand the Custom JavaScript section, and enter the following code:
NWF.FormFiller.Events.RegisterRepeaterRowAdded(function ()
{
var repeaterRow = NWF$(arguments[0][0]);
if(NWF$(repeaterRow.parents(‘.nf-repeater’)[0]).hasClass(‘expensesRepeater’))
{
alert(‘new row has been added to the expenses1 repeater’);
}});
Click Save and then publish the form. Add a new item, and click on Add New Row to add another row to the repeating section. A new row will be added to the repeating section and then a message box will appear.
Repeater Row Deleting
You can trigger this event with you want to inform the user they are deleting a row from the repeating section.
1. Open the designer and drag a Repeating Section control onto the canvas.
2. Click on the control and locate the CSS class field in the Ribbon. Type ‘expensesRepeater’.
3. Click on the Nintex Forms tab, and click on the Settings button in the Ribbon.
4. Expand the Custom JavaScript section, and enter the following code:
NWF.FormFiller.Events.RegisterRepeaterRowDeleting(function ()
{
var repeaterRow = NWF$(arguments[0][0]);
if(NWF$(repeaterRow.parents(‘.nf-repeater’)[0]).hasClass(‘expensesRepeater’))
{
alert(‘you are about to delete a row from the expenses1 repeater’);
}});
Click Save and then publish the form. Add a new item, and click on Add New Row to add another row to the repeating section. Next, click on the delete icon to delete a row. A message will tell you that the row is about to be deleted. When you click OK, the row will be deleted.
Repeater Row Deleted
You can trigger this event when you want to inform the user that a row from the repeating section has been deleted.
1. Open the designer and drag a Repeating Section control onto the canvas.
2. Click on the control and locate the CSS class field in the Ribbon. Type ‘expensesRepeater’.
3. Click on the Nintex Forms tab, and click on the Settings button in the Ribbon.
4. Expand the Custom JavaScript section, and enter the following code:
NWF.FormFiller.Events.RegisterRepeaterRowDeleted(function ()
{
var repeaterControl = NWF$(arguments[0][0]);
if(repeaterControl.hasClass(‘expensesRepeater’))
{
alert(‘you have just deleted a row from the expenses1 repeater’);
}
});

About three years ago, Timlin Enterprises began developing a Managed Services offering for SharePoint. We hired and trained new staff, developed processes and systems to ensure we could provide high-quality SharePoint support, and began offering the solution to our customers. Our first customers were typically running SharePoint 2010 or 2013 on-premise, and our services were designed to alleviate the need to install patches and monitor logs. The service grew over time, and we kept adding customers and staff to meet growing demand.
Not too long after we began providing Managed Services for SharePoint customers, we started offering them to our Office 365 customers as well. Right from the start, we noticed the type of support we were providing to our Office 365 customers was a bit different than what we were providing to SharePoint customers … it was more proactive in nature. While we certainly did (and still do) receive requests to help with a critical configuration issue or problem, the nature of our customer interactions was more about helping improve their Office 365 user adoption, providing training, and aiding with small projects to continuously improve end-user solutions.
Office 365 Innovation Picks Up
As you probably know, the growth of the Office 365 platform over the last three years has been tremendous. In October 2017, Microsoft reported that the number of commercial monthly active users was at 120 million. Further, they expect to have two-thirds of Office users in the cloud by fiscal 2019.
“About a year ago, our service began evolving in a few notable ways”
Timin Enterprises has been growing along with the Office 365 platform; and, approximately a year ago, our service began evolving in a few notable new ways:
- Clients began asking us about the new features and tools in the Office 365 platform, questions like: How does Planner differ from Trello, What is Delve all about, and Should I use Teams?
- Our customers were overwhelmed with the pace of innovation in the platform. They wanted to know what was new – from Teams to Project Online and Planner to SharePoint and OneDrive to Exchange and PowerBI to Flow, Yammer, and PowerApps – and how what was new pertained to them. They also wanted to know if anything major changed (hello modern document libraries), so they could provide users with ample lead time and deliver the required training.
- Client also told us they wanted to improve user adoption and make sure the Office 365 platform was being used effectively without exposing the organization to security breaches.
Managed Services vs. What We Offer
As we reviewed our business, we realized that the name “Managed Services” was not an accurate representation of the solutions we were providing our clients.
Personally, I’ve worked for two excellent managed services providers in my career. Both companies provided not only IT infrastructure managed services, but also Application Managed Services. Their application services were centered around ERP or CRM solutions and were focused on keeping the applications running, performing required maintenance, and answering technical questions. These companies had a pre-built list of tasks and services that were included in the plan.
The big difference between these application services and what we provide for Office 365 comes down to the fact that Office 365 is not an application, but a platform. For some businesses, this means providing a document management solution, other companies may need help with a project portal for collaboration, and yet others may need assistance with a knowledge management platform built on SharePoint. Each customer tends to use Office 365 tools and functionality in a different manner. This fact alone makes it close to impossible to come up with a consistent, known set of tasks.
In addition, a user of a CRM or ERP system has a much more defined set of actions they need to perform on the application. For example, a salesperson needs to update their opportunities, make note of their prospect meetings, and update their forecast. An accounting clerk needs to make the necessary accounting entries. However, users who collaborate on a SharePoint project or Team site use the platform in different ways.
“We are not just keeping things running, we’re making things better”
A Center of Excellence is Born
About three months ago, we rebranded our service offering to a Center of Excellence (CoE) for Office 365. This provides a better description of not only the solutions we provide, but also more importantly, what organizations need in order to maximize their Office 365 capabilities. Office 365 is a robust and extendable platform, that if implemented and governed correctly, can make a tremendous difference in business productivity in an organization.
Our CoE approach is designed to increase user adoption, help set up and manage an Office 365 governance plan, provide support for ongoing questions and issues, and help our customers deploy platform features to modernize your business operations to support the new speed of business.
We are not just keeping things running, as Microsoft handles that for you with Office 365. Our whole focus is helping you get the most value from the platform and increase the value you receive from your investment. We start with Strategy, Governance, and Architecture, and then tactically provide Training, Administration, and Support.
Learn more about the Center of Excellence framework by downloading our free whitepaper here.

Document Management Security in the cloud are big topics of conversation these days. We come across a lot of organizations and competing products all claiming to be the best when it comes to document security in the cloud. The purpose of this blog is to provide a real-world overview of using OneDrive for Business instead of a separate, stand-alone product, especially if you are already using Office 365. In the event you looked at this product two years ago and crossed it off your list, it is critical to know that the security features of OneDrive for Business has been drastically increased since that time.
There are obvious business advantages to OneDrive for Business over essentially every other tool out there – most notably there is no additional cost for current Office 365 subscribers and the integration with a whole suite of other products you are probably using – or intend to use. Why authenticate to, and integrate with, a whole new product when you already own one if it does the job. Your administrators generally already know how to manage the platform and will not need to learn a new product.
Let’s cut to the chase and run down the major security elements you may not be aware of currently in OneDrive for Business and Office 365. My goal was to cut through all various features to get to something concise and readable, but with links to more detailed functionality where applicable.
Microsoft Stance
First and foremost, Microsoft has stated that this is YOUR data, not theirs. It is not open and available for data mining or access by their personnel. They have taken great pride and effort in putting together a plan that will allow their customers to store their data with confidence. For more information, visit the Microsoft Trust Center: https://www.microsoft.com/en-us/trustcenter/
Based on the efforts to obtain validation for their investment in security, Office 365 has obtained independent verifications for the following:
- ISO 27001
- ISO 27018
- SSAE 16
- EU Model Clauses
- HIPAA Business Associate Agreement (BAA) with all customers
- FISMA
Data Protection
Files are encrypted at both the Disk Level (using Bitlocker Drive Encryption) and file level. The specifics are available via this (and many) posts from Tim Rains – Director of Security at Microsoft:
Tim also discusses the specifics of the security during transit and synchronization
Microsoft also has features in place to perform the following:
- Port scanning and remediation
- Perimeter vulnerability scanning
- Operating system security patching
- Network-level distributed denial-of-service (DDoS) detection and prevention
- Multi-factor authentication
Management Security Features
There are a myriad of features designed to allow for usability and flexibility in how to implement and secure the storage and collaboration of data in OneDrive for Business and Office 365. The key is to create a governance plan to understand your specific policies and then convert those policies into a technical implementation. Below are some examples of the security features in Office 365 / OneDrive for Business.
- OneDrive for Business file synchronization can be configured to work only on domain-joined PCs. It can also be configured to only synchronize to PCs that are members of administrator specified Windows domains.
- Block synchronization altogether
- Block certain file types from synchronizing
- Limit external sharing permissions for specific users
- Manage specific domain allowances for external sharing
- Time limit allowances for anonymous link access/sharing
- Separate sharing capabilities and rules for OneDrive for Business vs. SharePoint
- Site -> Library -> Folder -> Item level permissions
- Ability for users and admins to very quickly see who has access to a folder or document
- Create & Manage data retention policies for OneDrive or SharePoint sites
- Extremely detail-specific activity alerts for targeted actions for all or specified users.
- Administrative Permission Segregation
- Default & Custom Sensitive Information Types to be included in polices
- Unusual Sign-In Activity Detections

Mobile Device Management
The ability to manage devices, and specifically mobile devices in the BYOD world continues to improve for OneDrive for Business and related functionality, below is a sampling of the supported security features
- Conditional Access based on network location
- Restrict apps that don’t support modern authentication
- Multifactor and additional device security: PIN / remote wipe, etc.
- Block downloading files in apps
- Block screenshots
- Block copying, printing, backing up
- Require app passcode
- Block file access in non-OneDrive apps
- Encrypt data on the device
- More progressive sign-in timelines
- Manage activities after a device has been offline
DLP
Define Data Loss Prevention policies based on default or custom data information classification. Be alerted immediately to breaches in DLP policies. There is a default Dashboard showing recently policy matches (infractions) and false positives to help you refine your policies and information types. Policies are relatively simple to create, can be set to include or exclude certain users, and each policy can contain any number of extensively defined rules based on information types. You can choose severity, actions, notification, and exclusions.

Azure Rights Management
Information Rights Management has transformed to Azure Rights Management and can be added to OneDrive for Business or SharePoint document libraries individually. This technology allows the security to follow the document after it leaves the cloud instead of just securing it while it lives there.
Documents emailed outside your organization cannot be opened without actively authenticating against your Azure Active Directory to obtain current rights to that document. There are granular settings allowing specific users a limited time window for documents sent to them, and integration with Exchange for email encryption is supported as well.
https://docs.microsoft.com/en-us/information-protection/understand-explore/what-is-azure-rms
eDiscovery
eDiscovery in Office 365 allows you to create “cases” and create holds on specific data based on search criteria that may be defined via legal action. This search and hold capability spans SharePoint, OneDrive, Mailboxes, Public Folders, and can be locked down in its current state and exported for legal discovery purposes.
Auditing / Reporting
Office 365 support full auditing for almost all actions taken on OneDrive for Business files. The list is activities that can be audited is very large, but I’ve highlighted some of the main or interesting actions below to give you an idea of how much depth is in these capabilities:
Activities:
- Files & Pages: Accessed, Viewed, Modified, Deleted, Moved, Checked out, etc.
- Folder changes
- Sharing & Access Requests: Created, Accepted, Denied, Used Anonymous, etc.
- Monitor Synchronization Attempts & Activities
- Site Administration and Permission Activities
- Over 350+ event types in total can audited
Can Be Refined to:
- Person or People Based auditing if desired
- Date Ranges Supported
- Specific sites or locations

Hope this information helps! If you have any questions, fill out the form below and we will be in touch to answer any questions or help with any issues.
How To Maintain Licensing in Office 365 using Groups
Maintaining and administering licenses in Office 365 has historically been a time consuming and challenging task. If you administer Office 365 you will almost certainly been exposed to PowerShell in one way or another. If you have a large number of users in you tenant you have probably written PowerShell to license users en-masse, for example granting them an E5, or modifying the – services that users or groups of users have access to. This can be frustrating when Microsoft adds a new service to Office 365 and you need to disable access to it for all your users; first you need to find the hidden service name, then modify your PowerShell and then finally execute to remove the license.
Microsoft recently released new functionality that enables this task to be more easily accomplished using the user interface. You can now assign licenses based on Azure Active Directory Groups; the group can either be created in Azure AD or in your on Premises AD and sync’d up. If you have Azure Active Directory Premium 1, (part of other products such as Enterprise Mobility & Security, you can create a “dynamic” group – based on properties in the user profile, such as department. These Dynamic groups can also be used to assign licenses.
One of the powerful features with this, is that the licenses assigned are additive – ie it is the union of licenses assigned. So if a user is assigned to a group that gets an E5 license with just the Email and SharePoint services enabled, and is then added to a group which grants an E5 license with just Yammer enabled, the user now has all three services enabled. This allows you to create targeted groups that enable discrete features and add the users as appropriate.
If a user is assigned a license via a group and has previously been assigned a license “directly” the interface indicates that both types have been assigned. When you are confident that the users are all assigned licenses via groups correctly, you can use PowerShell to remove their “directly” assigned license – this will not remove the users license it will only remove the “directly assigned” license.
So how do you use this functionality, first login and navigate to the Azure Active Directory Management portal. From the choices, select Licenses

This will display a list a of the licenses that can be assigned in your tenant, for example:

From the list click the license type you wish to assign via Group, this will display a list of users that have this license assigned to them, for example if we select E5:

From the left navigation, select Licensed Groups:

This will display a list of groups that are being used to assign this license type, for example

In the above image it shows that currently no groups are being assigned licenses. Click the Assign button to start to assign to a group.
From the left navigation select Users and Groups – Configure required settings

Enter the name of the group you wise to user, for example here I am using the group “Leadership”

Select the group and click OK.
Next in the Left Navigation select Assignment Options
This will present the services which the selected license provides, for Example the E3 license

In this example we are granting all services. Notice that names presented are those show elsewhere in the UI, and unlike PowerShell you do not need to know the internal names.
If you now navigate back to Azure Active Directory and select all users, and select a user who was in the group, you can now see the licenses they have assigned, for example:

This Shows that I have an E5 Directly assigned and inherited through membership in the Leadership group. The assignment of the inherited license can take a few minutes to propagate, so keep refreshing to ensure this has completed.
I can now use PowerShell to remove the directly assigned license.
The script below can be modified to get your tenant License IDs and can be used to remove all licenses of a given type from all users. Note that if you attempt to remove the license from a user who only has inherited license the script will error – this is expected behavior
# Script to Remove license users for XYZ corp
# Get Creds and login
$userCredential = Get-Credential
Connect-MsolService -Credential $userCredential
# Get All Unlicensed users
# Get-MsolUser -All -UnlicensedUsersOnly
# get License Skus
#Get-MsolAccountSku
$eThree = “timlin:ENTERPRISEPACK”
Write-Host -ForegroundColor Cyan “Getting list of all users…”
# Get All users
$users = Get-MsolUser -All
foreach ($user in $users)
{
Write-host -ForegroundColor Green $user.DisplayName $user.UserPrincipalName
if ($user.IsLicensed -eq $true)
{
#Write-Host -ForegroundColor Yellow “removing license for ” $user.DisplayName $user.UserPrincipalName
Set-MsolUserLicense -UserPrincipalName $user.UserPrincipalName -RemoveLicenses $eThree
}
else
{
#Write-Host -ForegroundColor Yellow “removing license for ” $user.DisplayName $user.UserPrincipalName
}
}
Thats it!. Hope this information helps. If you have any questions, fill out the form below and we will be in touch to answer any questions or help with any issues.
10 Real-World Cloud Advantages For Business Applications
There’s no denying the cloud movement is in full swing at this point and both Software as a Service (SaaS) and Infrastructure as a Service (IaaS) offerings make a lot of sense for most organizations. However, there are additional considerations, capabilities, and opportunities to use the cloud that are less apparent to many companies during their migration and use of the cloud.
If you’ve invested in any application customizations or complete custom application development, Platform as a Service (PaaS) capabilities in the cloud create remarkable opportunities. Services like App Service, Service Fabric, Azure Functions, and Cloud Services provide customers with a comprehensive PaaS application platform for building, deploying, and managing apps of all kinds, that would have been difficult, costly, or impossible on premises.
Let’s cut right to the chase and provide 10 examples how this may be able to help you:
- Less IT Time Management and Cost: A recent study by Forrester Consulting commissioned by Microsoft (The Total Economic Impact™ of Microsoft Azure Platform-As-A-Service) reported tremendous reductions in management time and improved time to market.
In the highlights of this study, one representative organization had:
- An 80% reduction in IT administration time required to manage apps deployed on the platform
- A 25-hour average reduction in development and testing time required to develop or update Azure PaaS applications
- A 50% reduction in time required to deploy a new application solution to a client
- More than SaaS Offers: SaaS solutions are great, but often times they only get you about 80% of what you need. When you need more than what an out-of-the-box solution provides, Office 365 and Azure PaaS are incredible and cost-effective platforms to build custom applications. Don’t settle for the limitations of your existing software: customization options exist. It might not seem like much, but that extra 20% provides organizations with distinct competitive advantages required in today’s markets.
- Less Software Licensing Costs: Software licensing is expensive. By using Azure platform’s capabilities, your $25,000 SQL Server License could instead cost as low as $70 per month. With this one platform, you eliminate costly licensing like SQL Server, Windows Servers, and other Microsoft development tools. If you use Windows Server Data Center edition to run in the cloud, you eliminate those additional license costs as well.
- Greater Competitive Advantage: Utilizing a PaaS solution, your team can more quickly implement custom solutions for that extra competitive edge.
Examples include:
- Mobile-enable existing applications for teams within your organization
- Deliver real-time data and information right into the hands of your key folks and customers by integrating and connecting with other cloud apps/services
- Demonstrate to your customers that you can meet their increasing demand for technology, self-service, and information about your products, services, and their accounts.
You have a much greater toolset and far less overhead with PaaS and are therefore empowered to create these capabilities FASTER than your competition.
- Less Upgrade Costs: Make upgrading your software and platform simple, easy, and in many cases, seamless.
- Greater Scalability: Most people know you can scale up with cloud resources, but not as many also think about scaling down as well. It’s costly to liquidate hardware or let sit idle locally, but applications require testing, staging environments, and development integration. When you don’t need these resources, you don’t pay for them.
- Less Development Time: Integrated tools and features for deployment, databases, workflow, directory integration, security, and APIs with other cloud services are already available. Reduce the required 2-3 week wait in most large organizations for new development and test environment deployment.
- No Geographic Limitations: Cloud development, integration, test, and production environments allow distributed teams access to the same resources regardless of location and time of day.
- Less SDLC Time: Empower developers and testers to provision and decommission specific environmental needs without requiring infrastructure assistance. Instead of maintaining those environments manually, push-button environment duplication allows for on-demand regression testing.
- ROI: While there may be upfront costs, taking advantage of these services absolutely saves time and money if setup and used correctly. Invest now and measure the results for yourself.
When you shift to the cloud, think about these additional application-level opportunities to leverage for additional business advantages. If you’re not, you can bet your competition is. The additional capabilities for faster and less money allows organizations to offer better products, services, and pricing in a highly competitive market.
Reach out to us today to discuss how we can help deliver the competitive advantage your business needs.
The Project Manager’s Simplified Guide to Microsoft Project
As a Microsoft consulting partner, it’s no surprise we run our core business using Microsoft products. All project work completed by Timlin is delivered using the Project suite of products including task management, time tracking, resource management, and status reporting. These tools allow us to effectively manage our business without the obstacles that often are present when managing multiple projects using disparate systems and tools.
more
As a project manager, I need an easy-to-use solution and something I can quickly pull up to assess the health of multiple projects running concurrently.
The Phases of Project Management
Before we begin any project, we must understand the phases of the Project Lifecycle before determining the appropriate tools to solve our challenges.
- Identification – First we need to know why we’re undertaking the project. This stage in the lifecycle is often one of the more “subjective” phases since it’s frequently directed from the top down and/or primarily based on financial estimate; though there are many other secondary influencers.
- Prioritization – Organizational leadership frequently directs this stage and it requires ranking individual projects against an overall backlog or roadmap. Prioritization factors may include value, level of commitment, corporate strategy, expected outcomes, effort/work required, and interdepartmental agreement.
- Planning – Once the priorities are set, then we must determine the scope of work and available resources, assign those resources, and set the expectations for project milestones, deliverables and completion.
- Coordination – Next, we set up the logistics behind coordinating and managing the project workload such as task assignments, delegation, time allocation, and sequence of work.
- Execution – Once everything is in place, we need to manage the execution of the actual work on the project, including what we need to do, how to do it, and the collaborative effort required.
- Delivery – Finally we deliver on the project expectations and outcomes and present all deliverables to the client.
- Measure – We’re not finished yet; we then monitor, measure and report on the project results, outcomes, impacts, efficiency, timing, budget and other metrics.
From the perspective of a Project Manager, the Identification and Prioritization project stages are often less important to daily project planning and execution, however they are still areas we can and will impact. Ensuring the most cost effective and impactful projects are underway is often the biggest organizational hurdle during these phases.
In a perfect world, Planning and Coordination is done with a detailed eye towards scheduling and bandwidth, as these are the two of the most important aspects of a project. Proper planning and coordination is often the difference between success and failure after initial execution. Unfortunately, this often occurs outside the scope of many within the organization who can, and should have a say.
Execution and Delivery are the most visible of the stages and generally what leadership pays attention to. I have often heard the sentiment, “I don’t care how it gets done, I just want it completed on time and on budget.” Without proper visibility into project portfolios and resource time demands/constraints, these are the areas that suffer the most.
Measurement is the last and often most hurried step, but it’s one of the most important. Without effective measurement, we’re limited when it comes to determining future project outcomes. It’s easy to forget that data is king when discussing lessons learned, metrics and impact. We can more effectively report true project measurement, impact, health and slipping tasks when we deliberately manage the lifecycle in a repeatable fashion.
The Solution
Many organizations use piecemeal solutions that consist of disparate software packages, home grown solutions, and even MS Excel. There is a better way. As a project manager I want to have a solution that is easy to use personally and something that I can quickly pull up to assess the health of multiple projects running concurrently. Its also important to have an easy way to show my boss and our company leadership how each project is progressing, or simply have a well-informed answer to the status of things. Microsoft project/PWA, project server, and Project Portfolio Management (PPM) solutions solve these issues.
Like many Project Managers, I’ve been exposed to Project Professional throughout my career in one company or another, but I’ve now come to realize I had wasted far too much time piecing together updates, reporting, resource planning, etc. After using Microsoft Project Suite, I can attest to the fact that it makes a project manager’s life easier, allows more interaction with teams, and more time to diligently follow up and manage deliverables and timelines.
Initial planning can mean the difference between a successful or failed project. Utilizing the time sheeting and available Project Online tools, we can view the current time constraints of various resources needed for a project and when deployed, be alerted to overworked resources—imperative when running multiple projects simultaneously within an organization.
Using this whole suite of products, I am able to easily assess the bandwidth of a resource and make decisions about timelines during setup rather than when a deliverable/milestone is missed. Project allows you to create very detailed documents to plan and track your projects against other tasks. Using project online with integrated timesheets, reporting, and resource tracking and availability truly ties together the controllable sections of project lifecycle management.
There are plenty of solutions for portfolio management but so many organizations find them difficult to adhere to. If you want to make a big impact in your organization, use Project and Project Online, a specialty of ours here at Timlin.
Contact us today, we’ll help you tie everything together.
Is SaaS a Solution or Another Layer of Complexity?
It’s a question that keeps business owners and decision makers up at night—do we solve our problems with a custom IT solution, or use one or more SaaS platforms?
On the front end, it might seem better to use something that’s already there—SaaS solutions are often “plug and play,” the costs are right there in black and white and the learning curve is usually slight. Plus, it makes it easier on IT since they don’t have to do all the work.
This thinking only examines one facet of a complex question however. What happens if you require multiple SaaS solutions to meet your needs? This is when it starts to become a headache for your IT team.
In fact, a recent study by Better Cloud states:
“It’s easy to think that adopting SaaS applications will benefit the lives of IT. No servers, no problem. However, the majority of IT professionals do not believe this is the case.”
Each new SaaS app becomes a new moving part, another spinning gear, adding a new layer of complexity that now needs to interface with every other gear in your infrastructure.
The IT team needs to deal with more and more vendors and they lose their ability to solve problems right away. If your team is hindered by limited visibility into the service and management side of the app, they now need to create a support ticket with the vendor and wait—and all the while, the business suffers and bleeds revenue while the system is down or running inefficiently.
This doesn’t even consider the constantly swelling torrent of updates from each app. With a SaaS application, you are not in control of when changes are released. New patches from different apps don’t always play nice with each other and untangling the mess can be a nightmare. In addition, the ongoing updates can often effect the user experience and cause challenges with your users based on the lack of change control.
Despite this—per the Better Cloud survey—large enterprises expect to adopt a staggering 52 SaaS applications, on average, into their infrastructure.
This statistic proves that organizations are finding, acquiring, and adopting new SaaS solutions to solve specific business technology needs, instead of working with IT to deliver a fully integrated, custom solution, even though that may be a better strategic approach. Clearly, there’s a void between user demand and IT but the question is why?
Quality versus Convenience
A well-crafted IT solution takes time; proper controls, security and management must be followed, QA sessions and debugging, all of which are upfront costs while the problem that started the whole process continues to run amok. Historically, IT is overwhelmed with supporting day to day production needs, and it takes IT too long to deliver a solution for their users. A SaaS solution takes a simple install to plug the hole in the dam. Until another one arises of course. The saturation of SaaS apps in the marketplace, easy to use and deploy, has created an untamable proliferation of apps within organizations.
This proliferation of SaaS solutions inside an organization has led to fragmented IT solutions. We’ve engaged with many organizations where IT is completely unaware what the business uses to solve problems. One division may use Office 365 document libraries, while another uses Dropbox, and yet another use Box.com.
What’s the solution?
Collaboration. IT and the rest of the business need to work together. Each side must be flexible and balance speed with quality control.
And most importantly, establish proper governance to prevent fires in the first place. This eliminates the key selling point of SaaS and allows the IT team to deploy a more powerful solution. Often a simple customization, with only a slight trade off as far as time to deployment is concerned, offers more robust functionality than SaaS solutions.
Unfortunately, only 12% of IT professionals even consider customizability when evaluating SaaS apps.
The perception is that the ability to customize and integrate a given platform only benefits IT, but this is narrow sighted. In an environment where the complexity is increasing, and IT must continue to do more with less, the ability to customize and integrate a given platform can only benefit IT.
Many platforms and software tools allow customization with only a small amount of code or configuration, but non-IT people hear the word “coding” and associate it with “expensive” and “slow.” Office 365 and SharePoint 2013/16 continue to provide IT a great platform to develop custom applications with faster deployment and reduce the need for SaaS solutions. With Microsoft’s investment in the SharePoint Framework and the Office UI fabric, they have enabled IT and consulting companies to develop custom applications which can reduce the need for additional SaaS platforms. They also continue to add to the ever-growing list of REST based API’s.
In addition, Microsoft and 3rd party tools such as Power Apps, Microsoft Flow, and Nintex enable the development of apps that will easily automate business processes, and integrate with other line of business applications, SaaS platforms and even social media platforms.
We should know. At Timlin, we created our own ticketing system for our Managed Services clients that integrate with our Office 365 Project Server implementation which allows us to track time worked by individuals, as well as time spent on each client’s issues. That information is then rolled up into customized BI dashboards so we can forecast utilization, resource planning, and profit evaluation for our projects.
Our own custom-crafted solution eliminates the need for a separate SaaS ticketing system, a time-tracking system and a reporting solution. This provides greater visibility to our clients during quarterly reviews along with more intelligent data.
The Takeaway
We’re not saying everyone should completely consolidate SaaS solutions into one highly customized solution. But a custom-tailored suit is much more obtainable than you might think, thanks to platforms like SharePoint and Office 365.
Just a small amount of configuration or customization can deliver powerful solutions and automate tedious business processes, while keeping governance, control and security within your own two hands instead of in another vendor’s. Not to mention, this approach simplifies your IT environment and reduces the chances for incompatibility problems you’ll end up spending time and money detangling in the future.
Sometimes a best-in-class SaaS solution is the right solution, but don’t be afraid to design your own. Either way, we can help guide you towards a solution that’ll make you and your IT team happy.
So, what are you waiting for? Contact us today for a free consultation!
Office 365 FAQs: Answers from Industry Expert Ryan Thomas
 If you own Office 365 and haven’t used it for much more than email, document storage and Skype for Business, we’ve got some good news for you: you have a high-end platform right at your fingertips – and it may very well solve for a host of problems that you thought you needed to look elsewhere to solve.
In this blog, we’ll take a look at some come Office 365 FAQs, as this will help surface some of its capabilities that you may not know about. (Don’t worry, we’ll start with the easy ones!) While many of these solutions may require configuration and training, they can also be transformative and highly successful for your organization.
Q: I don’t have a quality, integrated solution to manage my projects or tasks on an enterprise-wide level. My project resources don’t like Microsoft Project; but my Project Managers love it. Is there a better solution?
A: Yes! Office 365’s platform supports an enterprise-quality Project and Portfolio Management solution that may be difficult to discover unless you know where to look. Using Project Server Online, available as an integrated solution within your Office 365 tenant, you have access to a whole new level of project, resource and portfolio management. Keep in mind, this is NOT your father’s Project Server. By that I mean it’s much nimbler and more “lightweight” than you might think: the infrastructure investment is gone, giving you more time to focus on ways to optimize and improve your project management.
Q: I would love to eliminate company emails entirely – they should not be the main source of finding information. What’s the best way to disseminate and publish current information in an efficient, yet personal, way?
A: This is an easy one for Office 365, and most of you probably know about the ability for SharePoint Online to provide a robust platform as an Intranet, content management system, and information sharing. This is a core competency for the Office 365 platform, and there are numerous customization options for branding, content creation and personalization.
Q: I need an informal way to collaborate in real time on projects, both within my organization and with external partners. Some project users have third-party tools — but I’d love to centralize our services within a platform that we already own, pay for, and know how to manage. Does Office 365 solve for this?
A: Yes – in fact, in terms of security, compliance, support and cost, you’re smart to stick with something you already own. Office 365 provides a one-stop experience for replacing many of the third-party tools (like Dropbox, Google Drive, Basecamp and Trello) that most organizations don’t want to pay for or support. With Office 365, setting up secure sites to provide internal and external collaboration is very easy. The platform also supports highly robust auditing to ensure data is monitored and secure. Plus, Microsoft provides specific services to match many of the ones mentioned above, and that support is integrated into the existing platform to make permissions management and search intuitive and user-friendly.
Q: I need to better way to transform email-based, paper, or manual processes into an electronic version to prevent human error. Also, I need a new system that will provide reporting and search capabilities for these new processes. How can I do this?
A: You may not realize that Microsoft has an entire infrastructure based on workflow services and capabilities within Office 365 and SharePoint Online. It’s designed to replace email and paper-based and/or manual process. With electronic forms, signatures, routing, approvals, and reporting, you would be able to automate extremely complex and cumbersome processes.
Q: Our company has a set of file shares (that are 5, 10, 15, even 20 years old) and they contain everything from personal music and cat videos to confidential SEC filings. It’s truly a mess – you can’t find documents without knowing exactly where they are. Plus, I’m afraid of potential legal or compliance issues that may be lurking. What should I do?
A: There are a couple options here: One is to just move everything to the cloud and get it out of your existing infrastructure so you can retire your classic file shares. While this solves a couple of problems, it may perpetuate others: you would alleviate your on-premise or hosted infrastructure needs and gain much better search and retrieval capabilities, but your data growth and “bad data” will continue to grow, possibly even faster. At some point the clutter of poor data, duplicate (and almost duplicate, which is even worse) data could create overwhelming efficiencies in daily work.
Here’s what I would highly suggest: invest some time and education in moving this data to more appropriate locations through some taxonomy and information architecture exercises. Even if you don’t classify and categorize every single document, some middle ground may be OK in this scenario – and in that case, Office 365 is the perfect solution to help you do this.
Q: My employees are very disconnected from one another, and basic tools like email and IM are definitely not enough. I really need to come up with a strategy for connecting people on both a business level, as well as a personal and social level. Does Office 365 have features to support these needs?
A: It sure does. In fact, Office 365 contains a number of features that are specifically designed to move communication and collaboration into a real-time, “just-in-time” scenario. Through instant chatting, the solution takes advantage of co-authoring, community features, profiles and artificial intelligence in searching. Plus, in using embedded real-time chatting, Office 365 merges some classic concepts that combine “talking about data” with “working on data.”
Q: I would like to know what my team and colleagues are working on. For example, when are team members publishing documents? Which documents are actually being looked at? That sort of thing. How can I do this?
A: Try this: check out Delve using Office Graph in Office 365. There is also a mobile app that notifies you when your colleagues post documents that may be useful to you. The software builds upon this intelligence to “learn” what information is most valuable to you, and provides notifications accordingly.
Q: I’ve found the following processes to be highly inefficient: sending documents back and forth via email, checking to make sure I have the right version, and IM’ing colleagues about what they want to change in a document. What are my options for streamlining this process?
A: Office 365 supports real-time document creation, co-authoring and chat within a Microsoft Office document – all from a web browser. With some modifications to your normal process, there are many options to allow you to take advantage of these features to optimize efficiency, reduce errors and minimize data loss.
Q: My organization has A LOT of data — but without reporting or visualization, we have great difficulty in understanding it. I really need to build some visual reports tied to actual data, both inside and outside of Office 365. How can I do this?
A: Using Excel or Power BI within Office 365, you can connect to a large number of data sources and then use those connections to create visual charts, graphs and drill-down reports that make sense in context. Visualize and build a dashboard to help you understand what’s happening in your organization —which in turn will help you to make better decisions and divert resources to what’s needed most.
Q: I need to be able to store a lot of backups, both with and without Office 365 data. I really want to stop buying and maintaining this infrastructure myself. What are my options?
A: One of the big draws for Azure is the ability to use it as a secure and highly available data storage solution. Using this infrastructure to store on-premise or Office 365 data as a backup for compliance reasons is an extremely cost-effective method.
Q: I need applications like call or ticket management, inventory systems, contract management, and apps for lots of other business initiatives. I’m hesitant to seek out third-party disconnected tools, buy them, learn them, train my users on them, etc. Can my existing Office 365 platform do this for me?
A: Not only can Office 365 do it for you, but it can do it without you having to worry about infrastructure management and licensing fees. What most people don’t understand is the deep capabilities exist to build entire custom applications on the Office 365 platform. Although the classic days of “back-end” code may be gone in this world, the client-side options and hosting of data and processes within Azure and Office 365 have a created a whole new set of options for building intellectual property that’s unique to your organization. If the existing services and features don’t meet your needs, deeper customization is still strongly supported and encouraged. In fact, many organizations still develop and maintain custom applications that were designed for their specific needs.
All in all, I hope these Office 365 FAQs serve as a good way to highlight the platform’s comprehensive range of capabilities. One important to note, though – while Office 365 may be a good “short answer” to many of these questions, implementing the right tools and solution does require time and commitment. As with implementing any solution, you are changing how people work – and such transformations don’t occur overnight. Be sure to build in time, resources, training and support you need – and remember that you can contact us at any time for help.
HubSpot Call-to-Action Code end HubSpot Call-to-Action Code
Office 365 & SharePoint Intranet: Checklists for Successful Adoption
 In Part 1: Office 365 & SharePoint Intranet: The Basics for Successful Adoption, we discussed how to lay the groundwork for your Intranet or collaboration solution, as well as some common pitfalls to avoid. We also learned about not falling victim to the “Field of Dreams” mentality. (To recap, don’t build a great solution and expect people to come – your Intranet takes careful planning, along with ongoing effort and evaluation to maximize adoption.)
In addition to the tips mentioned in Part 1, here are some additional considerations. Consider them your “strategy checklists” to follow in order to make your Intranet adoption a success.
Branding and Communication
- Get marketing on board. Include marketers, writers, designers and corporate communication resources from the start. Delivering the right message to various teams is critical: this team will have valuable input in the planning phase, so please to them while creating your road map, scope, and vision.
- Give your product a name and breathe life into it. This solution should be treated as its own branded initiative, so avoid calling it SharePoint, Office 365 or anything that sounds too generic. This better helps your employees better connect to it, and for employees who have experienced past failed attempts with such solutions, it will help them dissociate.
- Change the look and feel of your underlying platform. Your Intranet should reflect your organization. Again, this where marketing can help. Employees will want to think of this as an application that performs specific and useful capabilities unique to your organization –this differentiation is critical and what resonates most. Technically, while the features alone may not be unique, the combination of them — along with your brand — make it something no one else has.
Personalization
- Apply concepts to your specific business unit or need when discussing, explaining, or demonstrating features and concepts. This helps people think about how it will help them in their daily activities directly.
- Understand and segment generic vs relevant content. Generic content is important, but shared to all equally. Relevant content will is specific to geographic locations or business units. Apply the targeting of that content with that understanding, approach and training.
- Consider a “CEO Corner” blog post to get people directly connected with the leadership team and provide an easy mechanism to do so.
- Discuss options for employee recognition programs. Consider peer nominations, or rewards and highlights that give people additional reasons to care about what’s going on.
- Spotlight employees each month with a short article/profile on him or her. This helps people get to know their colleagues and fosters personal interests outside work.
- Support user profiles and give individuals the ability to edit this data. Much like a social network, this makes it easier to find people and learn their skills, and open the door for more collaboration.
- Consider gamification: Apply points for users who are contributing content: for instance, reply to community posts, answer questions, encourage users to fill out their profile, etc. Tie this into visual notifications via badges (similar to online forums) to indicate expert level users for both support and employee recognition.
- Combine techniques to continue building a sense of community based on employees, not just products and marketing.
- Highlight projects or products from the perspective of the individuals working on them. This is an engaging “grassroots” way to help disseminate company product/project news.
- Promote customer/product success stories: Contribute to a sense of team by showcasing team wins and how they were made possible via the efforts of many different supporting groups. Discuss how different groups enable the success via certain activities.
- Leverage user profiles to highlight colleagues and connect those profiles to their projects and efforts. In larger organizations in particular, this helps create a cross-pollination of ideas and knowledge for people in similar roles.
Additional Ideas
- Make content essential: You are missing out if you are not seeing it, and the only place it lives is on the intranet. Don’t send an email with the content – rather, ask internal communications to send the email with a link to their new article instead. Prevent sending attachments and all information via email unless it’s targeted at the individual.
- Get mobile! Searching your email is a terrible user experience – especially on a phone. Capture your commonly accessed content (that’s normally sent via email) within your intranet and build a specific mobile experience to make it easy to find and read. Get them to “read the news” from their phone by going to an aggregated mobile page connected directly to your content.
- Understand why people like third party tools like Trello, DropBox, BaseCamp, etc. and figure out how to give them that same great experience within your ecosystem. Office 365 has tools to replace all of these applications while keeping your data within a supported, searchable and secure ecosystem. This will get people looking inward for innovation, help, and support instead of just solving problems on their own with their own set of unsupported tools and services. Think like they do!
- Don’t forget the small stuff like the cafeteria menu and local events. Make sure your regional content works or you may risk offending people by including content not applicable to them at all.
- Work heavily with legal, HR, and IT to template and publish common documents only on the intranet in their department locations. Stop sending attachments with the latest IT or HR policies. Instead post the updated handbook to the HR site, and send people a note about it. To really spice it up, provide double the points for the first 50 people that read the updated changes.
- Understand how each business unit communicates — there are a lot of opportunities to get this content out of email and into a searchable, findable, accessible location within your intranet. This will get people looking in a new location to find what they need.
- Make contributing content EXTREMELY easy. This process should be intuitive and easy.
- Think simple by creating and offering what the business needs and what the vision dictates, not what you think should make a good intranet.
- Make it searchable. Put some effort into tailoring this to your content, including refinement, filtering, or adding specific search pages with some predefined content filtering.
- Learn from analytics to understand behaviors, search queries, navigation patterns and more – all with the goal of using that information to improve the content, structure and your tool’s capabilities.
Don’t Forget to Follow Through
Last but certainly not least, the follow-through is one of the most poorly managed aspects of Intranet or Collaboration projects – yet it’s arguably the single most important element. Remember these strategies:
- Training: Ensure you have a system in place that allows you to train and support users for a significant period of time beyond just the initial launch. This includes offering supporting materials, onboarding new users, and using specific methods to ensure new employees have a documented approach in learning how to use the solution.
- Passive Support: Offer resources beyond the helpdesk for people to reach out to for advice, options, feedback, and best ways to use the tool to solve specific problems.
- Active Support: Include defined check-ins to ensure everyone is able to use the solution, find what they need, and resolve issues quickly. Don’t wait for users to get frustrated – tackle problems proactively.
- Content Management: As part of active support, it’s critical to have ongoing participation, training and encouragement with the content providers. Work with them on a continual basis to accomplish this.
- Ongoing Phases/Planning Meetings: Find new ways to improve the solution in any and all areas. Actively solicit feedback, discuss the possibilities with the governance team, and put it on the road map. Make the road map public so people know you are listening and continue to build and evolve a great solution.
All in all, the adoption of your Intranet and Collaboration project is not a simple technology exercise. Its success is reliant on these core strategies and best practices that require ongoing attention. Remember, we can help you implement your solution and set you up with the strategies that will make your solution a long-term success. And keep in mind, if you’ve already built your Field of Dreams and no one is showing up, we can help get up to speed to make sure it does meets your vision. If you have any questions or need help with your implementation, please don’t hesitate to reach out!
HubSpot Call-to-Action Code end HubSpot Call-to-Action Code