Microsoft
Run Flows Directly from SharePoint List/Library Using JSON Column Formatting

Good ol’ SharePoint and Power Automate. Two fantastic tools that power users and citizen developers use every day and seldom let us down. They have set the bar for Company Intranets and Business Enterprise Platforms. Continuously adding new features and enhancements. Ensuring all licensees are in the best of hands. As powerful as each is on its own, they are even more powerful together.
This post will cover triggering a flow directly from a SharePoint list or library, for selected items. This can be done using the default OOB Power Automate integration, or by adding custom JSON formatting to create buttons for specific items. I will cover both methods below:
First things first, create a flow with one of the following triggers:
For libraries:

For lists:

Pass in the following trigger parameters:
- Site Address
- List or Library Name
Using the OOB integration:
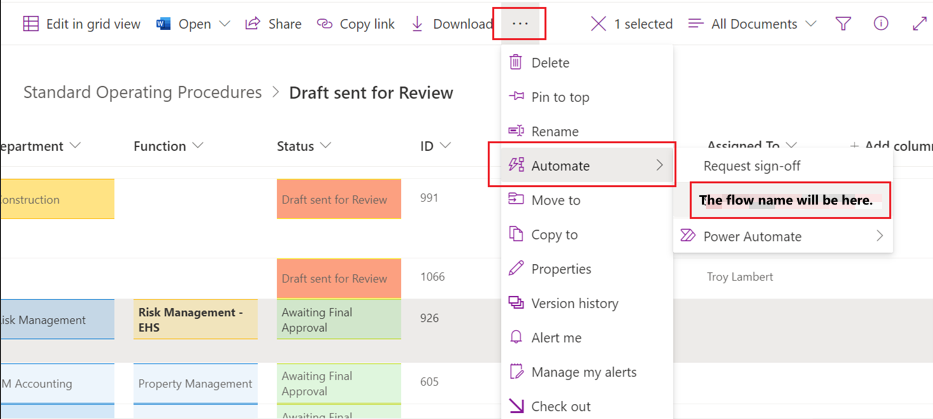
The list or library you entered in the flow trigger will automatically be displayed in the ribbon. To run it, do the following:
- Select an item from the list or library.
- In the ribbon, click the 3 dots (…).
- Hover over Automate.
- Select the flow name from the menu.
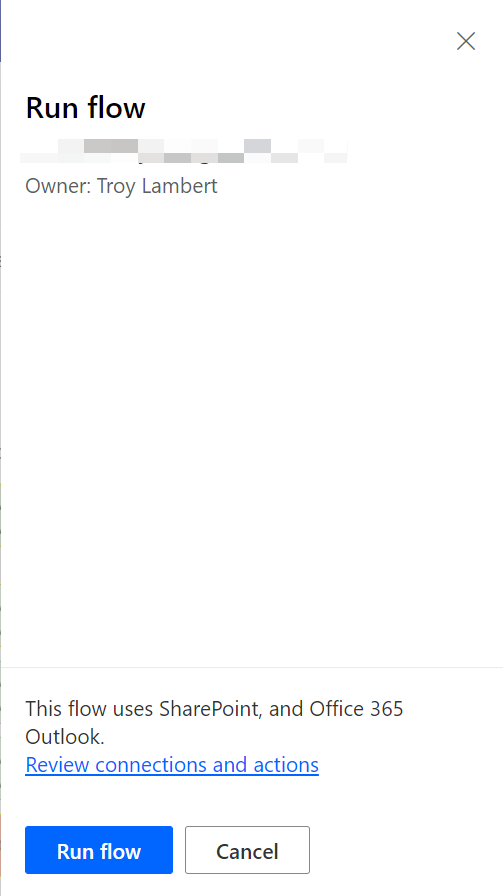
- Select Run flow.
- See screenshots below.
While the OOB method certainly gets the job done and is quicker to set up, it has its inconveniences and limitations. For instance, the number of steps or clicks it takes to run the flow can be a bit much for some users. Understandably so. Selecting an item, then selecting a button from the ribbon menu, then hovering over another button just to be able to select another button that appears, then followed up by one more button to select to run the flow. These days, the less screen navigating, and button clicks the users need to do, the better. That is where the next method has its benefits.
JSON Column Formatting:
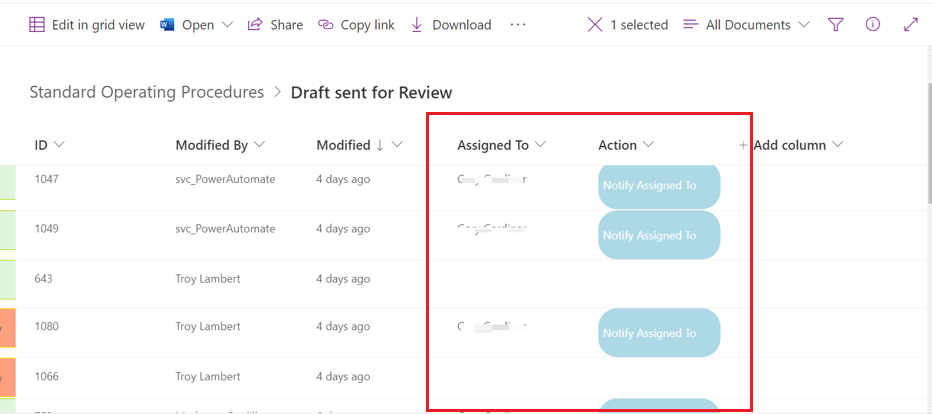
This method allows columns to be formatted as a button associated with a specific item. The button will display within the item fields like the rest of the metadata and will open the panel with the Run flow button. Minimizing the amount of clicks a user needs to run the flow.
This method also allows the button to be styled as a link or any way you prefer. Using the JSON formatter. Another neat feature of this method is that you can use conditional formatting based off other columns. In the example below (see screenshot below), the button to run the flow is only visible for items that have an Assigned To. This makes sense for approval workflows. Not allowing approval workflows to be triggered if there is no assigned approver.
To access column formatting, do the following:
- Click on the dropdown of the column you want to format.
- Hover over Column settings.
- Select Format this column.
- See screenshot below.

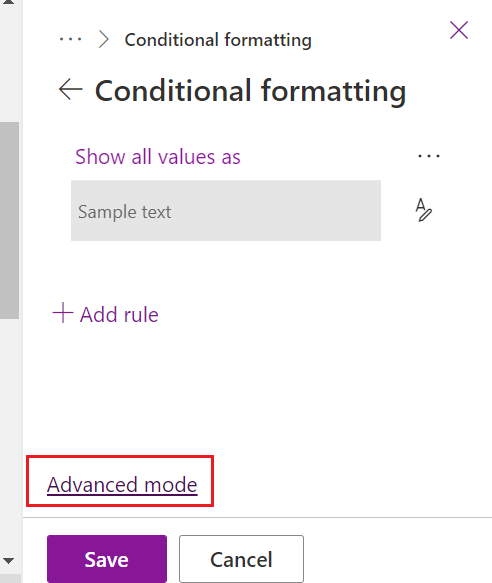
To add custom JSON, do the following:
- Select Advanced mode.
- Paste in the code.
- Select Save.
- See screenshots below.

In my example above, to get the light-blue button with white text and have it show only on items when the Assigned To column is not empty, use the following code:
{
“$schema”: “https://developer.microsoft.com/json-schemas/sp/v2/column-formatting.schema.json“,
“elmType“: “span”,
“customRowAction”: {
“action”: “executeFlow”,
“actionParams”: “{\”id\”: \”546e42c3-23fc-41fa-950f-6f7331e7edce\”}”
},
“attributes”: {
“class”: “ms-fontColor-themePrimary ms-fontColor-themeDarker–hover”
},
“style”: {
“border”: “none”,
“background-color”: “lightblue”,
“color”: “white”,
“padding”: “5px”,
“border-radius”: “20px”,
“display”: {
“operator”: “:”,
“operands”: [
{
“operator”: “==”,
“operands”: [
“[$AssignedTo.email]”,
“”
]
},
“none”,
“flex”
]
},
“cursor”: “pointer”
},
“txtContent”: “Notify Assigned To”
}
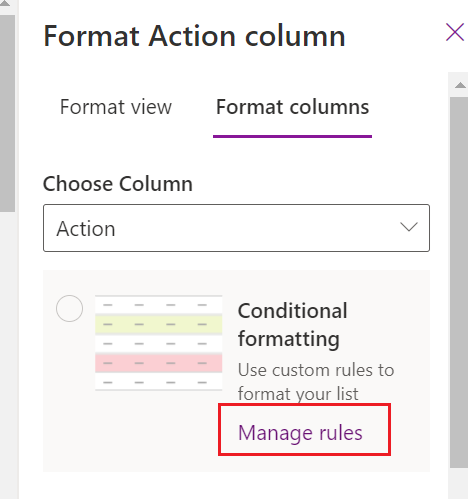
As a pointer for creating your own custom JSON, a neat little hack I find very useful is to use the design mode OOB conditional formatter to intuitively add rules and conditions. This generates JSON underneath, and that JSON can be used as a starting template for add your own customizations to. It is much easier to start with JSON that your SharePoint list already recognizes than it is to start from scratch or find solutions online that need to be completely restructured.
To accomplish this, do the following:
- Select Manage rules.
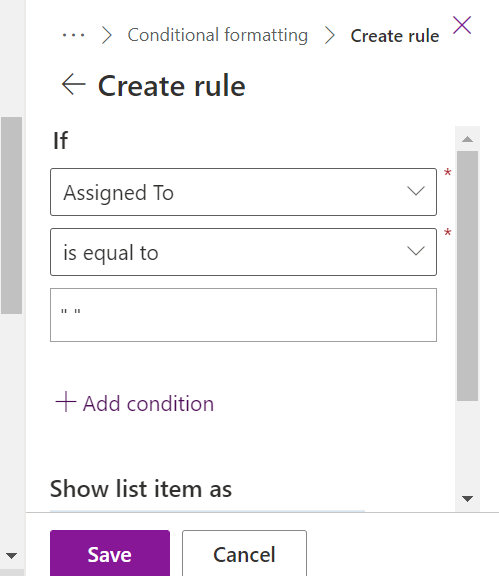
- Select the column to base your condition off.
- Select the operator of the condition.
- Enter the value the operator should look for.
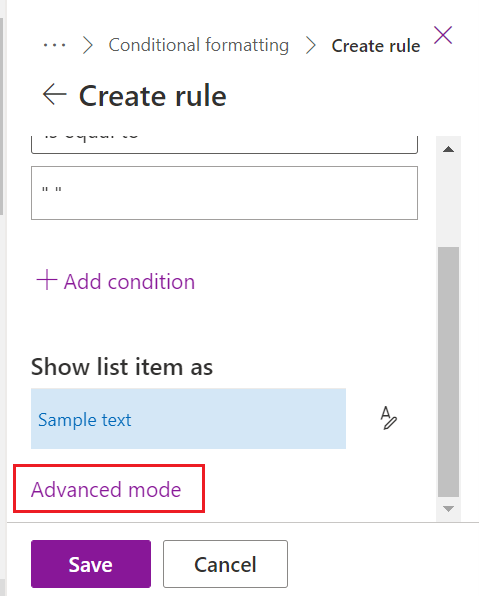
- Switch to Advanced Mode.
- Copy out the code that was generated.
- See screenshots.

That concludes the pot.