SharePoint
Managing SharePoint Item-Level Permissions with Microsoft Flow

Timlin had the opportunity to create a knowledge management system for a client using SharePoint Online. One of the requirements was to use item level-permissions to control access based on metadata. We used Microsoft Flow to satisfy this requirement and provide the client with a low-maintenance process along with tracking and visibility.
The Setup
To get started, a Document Library entitled Articles was created. The library contained metadata to indicate Visibility, as well as a lookup to a Department’s list. The Department’s list was a list of each of the company’s departments, with an additional Text column to store the AD group associated with that Department.
The rules to be implemented were: If the Visibility is Public, grant everyone access to see the document. If the Visibility is Confidential, only members of the tagged Departments would have access to view the document. In order to prevent any visibility into Confidential documents, the initial permission for all items did not include the Visitors group.
The Flow
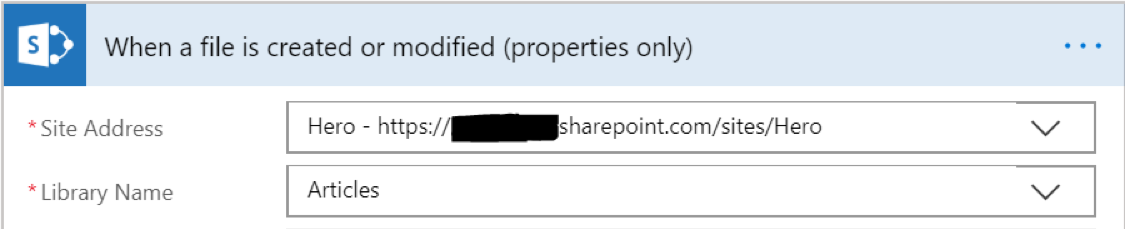
To begin, a Flow was created using the “When a file is created or modified (properties only)” trigger, specifying the Articles library as the source Library Name.
Two Integer variables were initialized to hold values needed later.

In order to grant access to Visitors, we need to retrieve the principal for the site group. This is accomplished using the “Send an HTTP request to SharePoint”. This Action allows you to send a fully authenticated request to the SharePoint APIs.
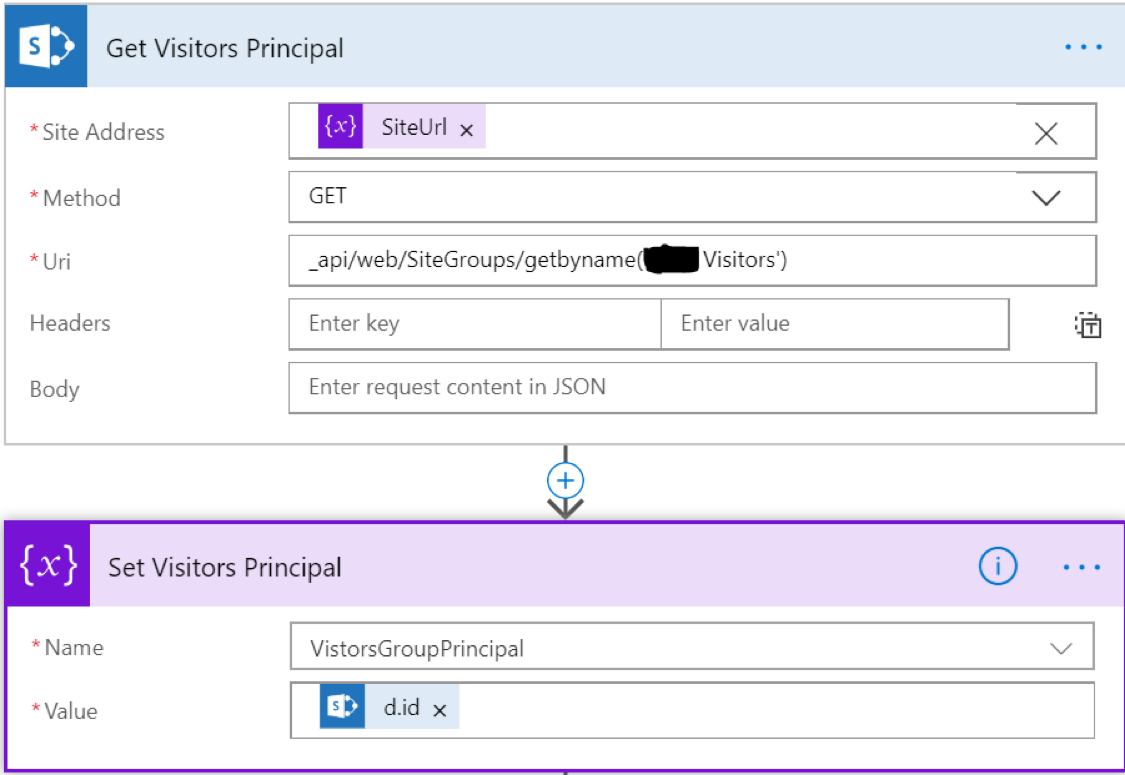
In this case, we use the SiteGroups/GetByName call to get the Visitors group. We then store the value in the variable we stored. Based on the way the JSON data is returned, we want to set the variable to the value in [‘d’][‘id’].
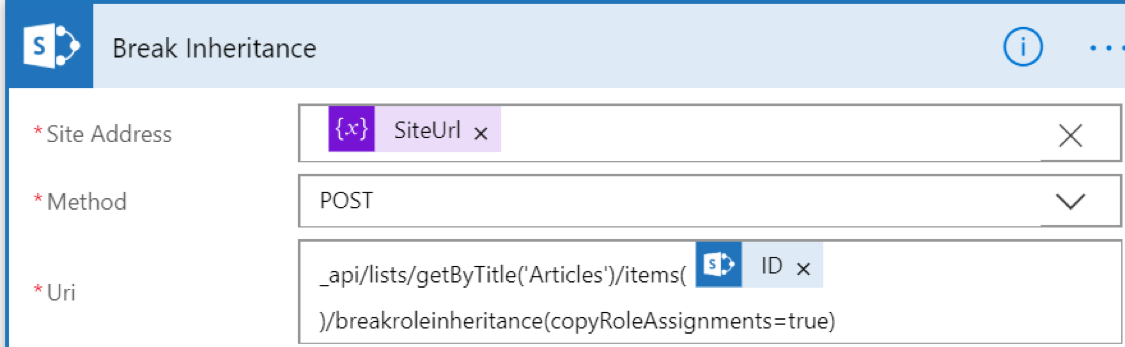
Next, we use the same component to break inheritance using the BreakRoleInheritance POST request on the item, using the ID from the original trigger.
We’ll use the Get Items action to retrieve all the values for the Department’s list. We’ll use this later to ensure we clean up properly.
To get started on setting permissions, we’ll use the Switch control to determine what action to take based on the Visibility column. For Public visibility, we’ll grant access to the Visitors group using the same HTTP Request action from before.
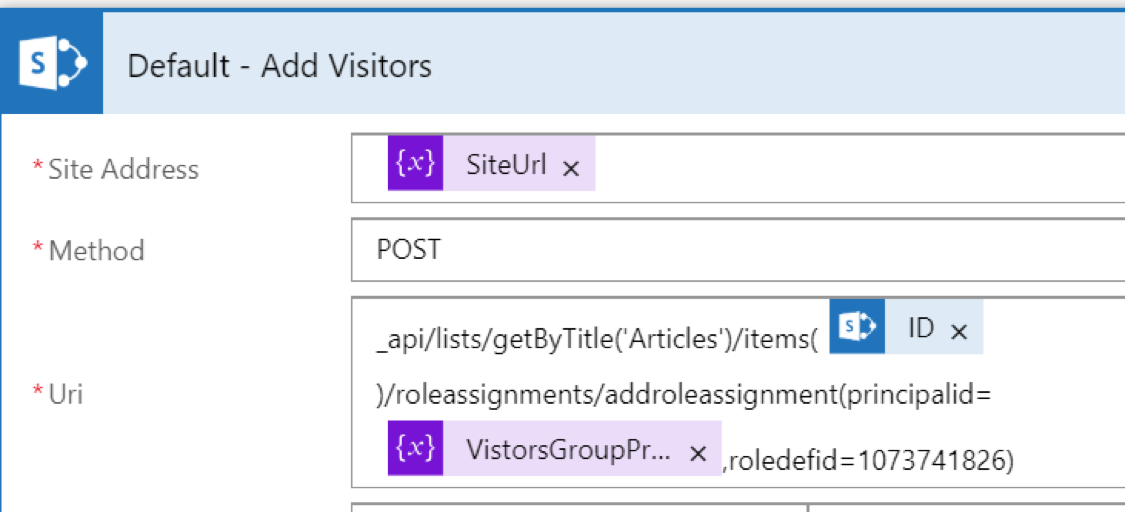
We’ll use the RoleAssignments/AddRoleAssignment method on the item to add the Visitors group we looked up earlier.
Note: to get the RoleDefId for the permission level you want to set, you can use the /_api/web/RoleDefinitions endpoint to retrieve all roles for the site collection. Look for the Name element of the desired Permission Level and find the corresponding Id value. In this case, we use 1073741826 which is associated with the Read permission level.
We have much more work to do for Confidential documents.
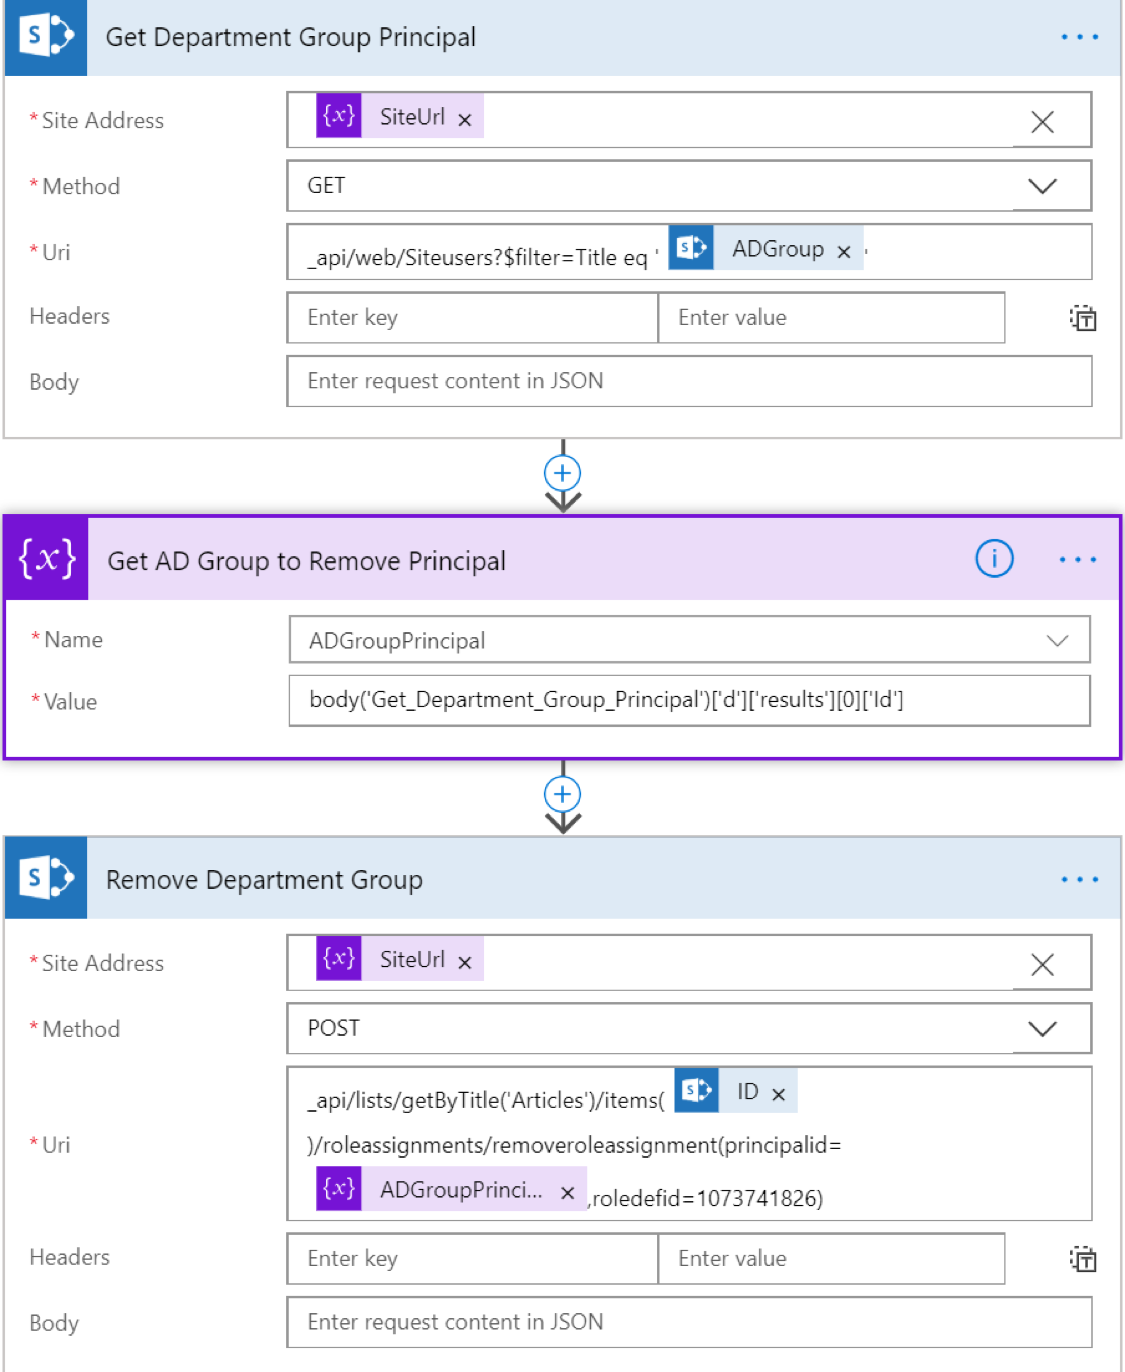
First, we want to remove any existing Department Group assignments. We’ll use an Apply To Each action to iterate over the Department’s list we retrieved earlier. We need to get the Principal for that group, similar to how we retrieved the Visitors group, and use the RoleAssignments/RemoveRoleAssignment method to remove any permissions for that group/permission level.
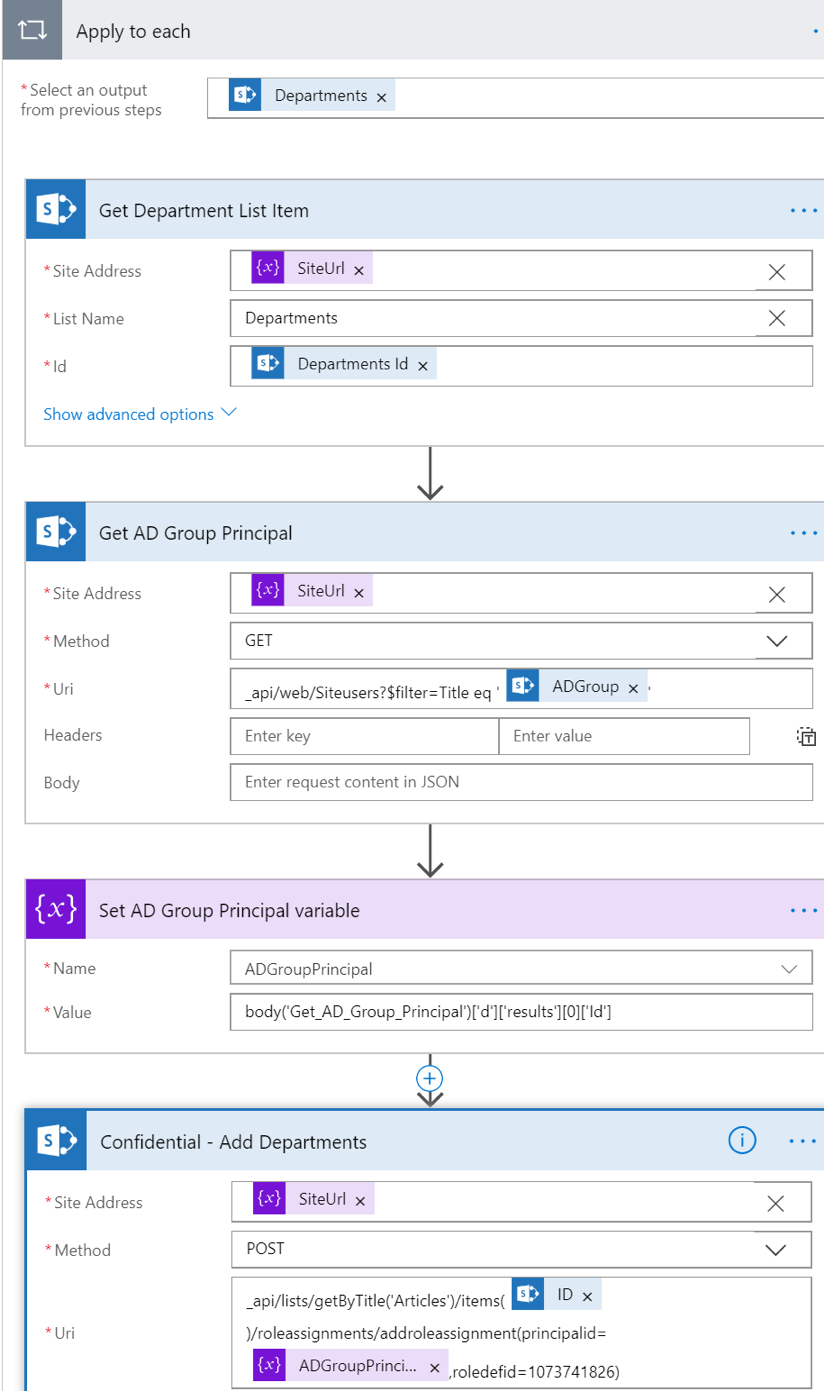
Once removed, we’ll again iterate, this time over the departments associated with the Article. We’ll retrieve the full Department item using the Get Item action, so we can find the corresponding AD Group associated with the Department. We’ll store that value and once again use the RoleAssignments/AddRoleAssignment method to grant Read permission to the item.
Upon execution, any items added or modified will have the appropriate permission level set based on the Visibility and Department values tagged by the author.
