Microsoft Flow
How to Initiate Flows from PowerApps

Flows and PowerApps go hand in hand recently. They can transform many different business processes such as Employee Onboarding/Offboarding, Nominations, Permissions, Site Creation, etc.
A great way to utilize Flows and PowerApps in tandem is to allow a PowerApp to initiate a Flow and feed the Flow that information which is already provided in the PowerApp Form.
Creating the PowerApp
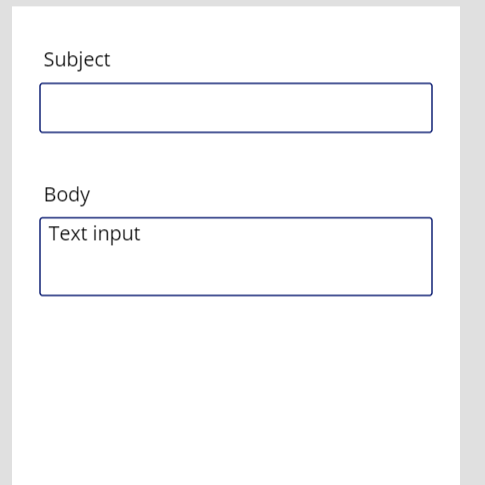
In this example, we are going to create a simple blank PowerApp that will have two fields: Subject and Body.
If you haven’t guessed already, the PowerApp will contain a button that when clicked will initiate a Flow that consumes the information entered by the user into the Subject and Body fields and send an email to whoever the Flow has defined as a recipient (you could theoretically go a step further here and define the recipients in the PowerApp but I’ll leave that up to you).
Your new PowerApp should contain at a minimum two Text Input fields. You can make one of them multi-line if you’d like for the Body. Ours looks like the image below.
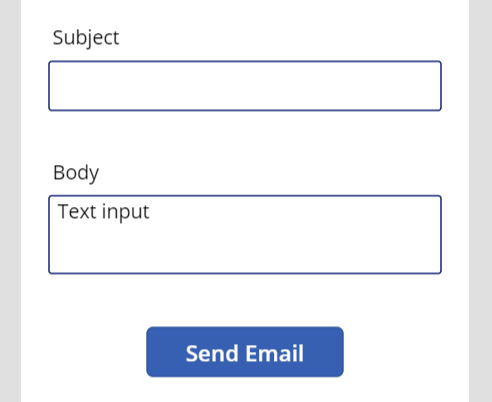
Next, we will add a simple button to the PowerApp labeled “Send Email”.
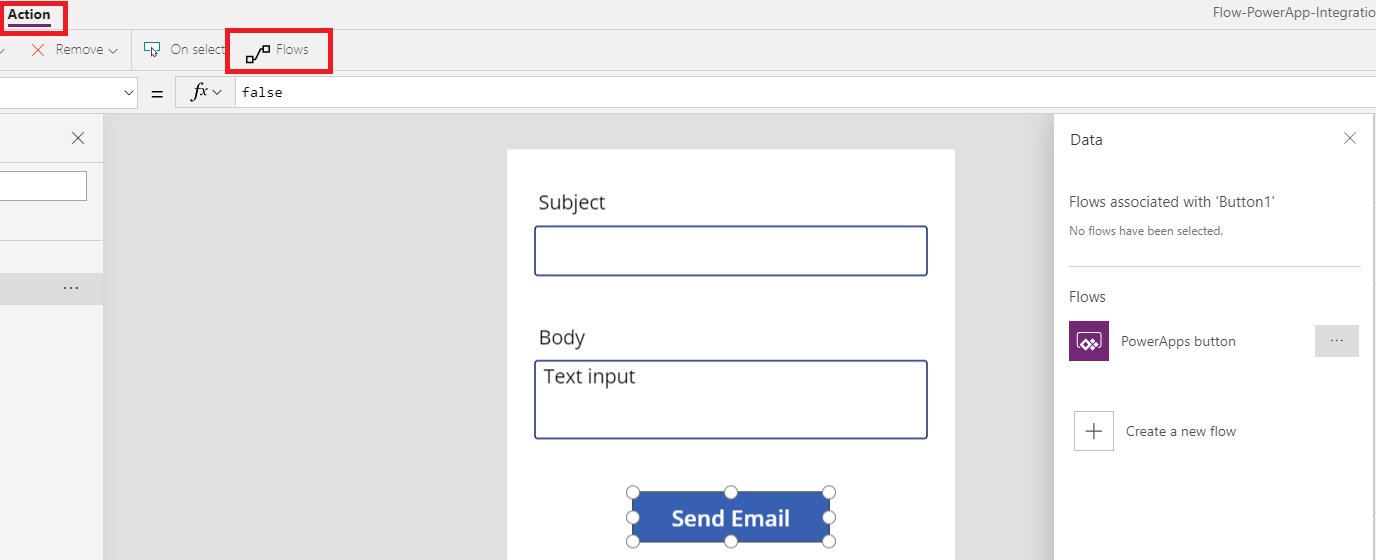
With the button highlighted/selected, navigate to the “Action” tab and click on “Flows”.
You’ll notice in our example, one Flow already appears. This is because any Flow you have created in this environment that has a plain trigger of “PowerApps” will be consumable in the PowerApps themselves.
Creating the Flow
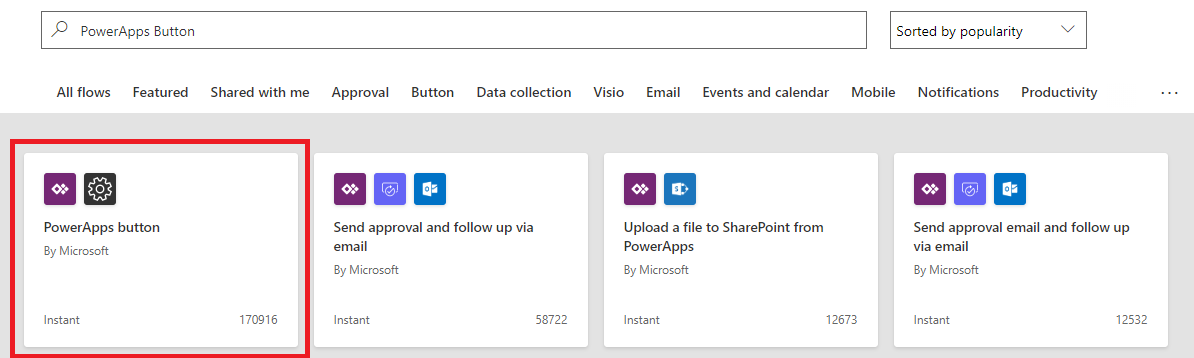
For this example, click on “Create a new flow” to start the Flow Creation process. We want to make a simple two-step Flow so click on the first template available which is the PowerApps to Custom Action flow template.
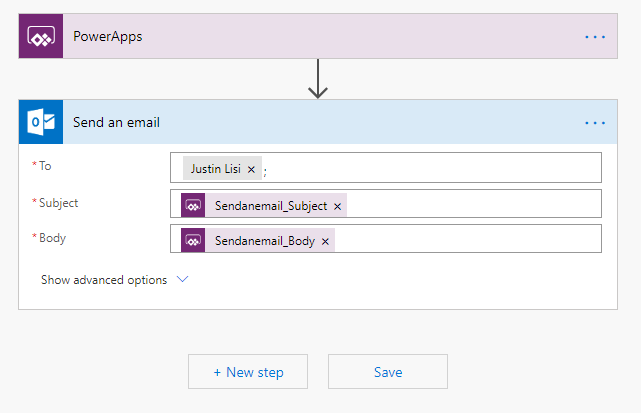
Next, we will want to create a single new step called “Send Email”. You can define yourself or anyone you’d like as the recipient and when clicking on the “Subject” or “Body” property, you will be given the dynamic content property of “Ask in PowerApps”.
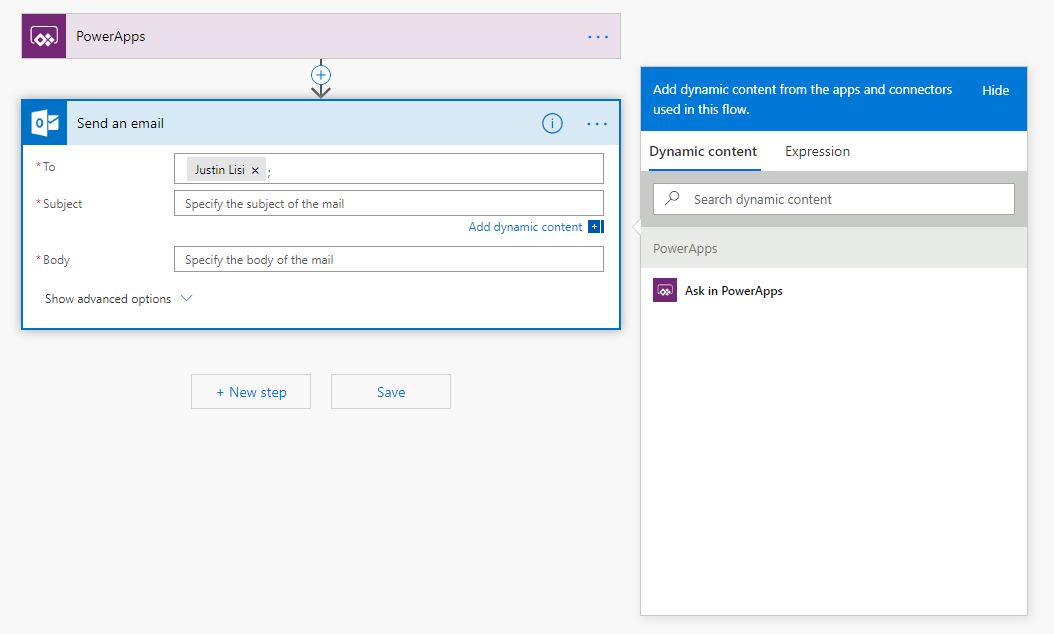
If you use that property for both values, you should then be presented with something like the image shown below.
Setting Up The Action Button
Save your Flow and head back to the PowerApp we created earlier.
If you close and re-open the “Flows” panel, your new Flow should now be available. While you still have the “Send Email” button selected, click on our new Flow to add it to the button. Once added, you will notice that the “OnSelect” property has been filled in with the action of “SendEmailfromPowerApp.Run(“.
The name of this action may vary based on what you named your Flow. You will also notice that it is asking for two parameters. These parameters are the Subject and Body we asked for in the Flow.
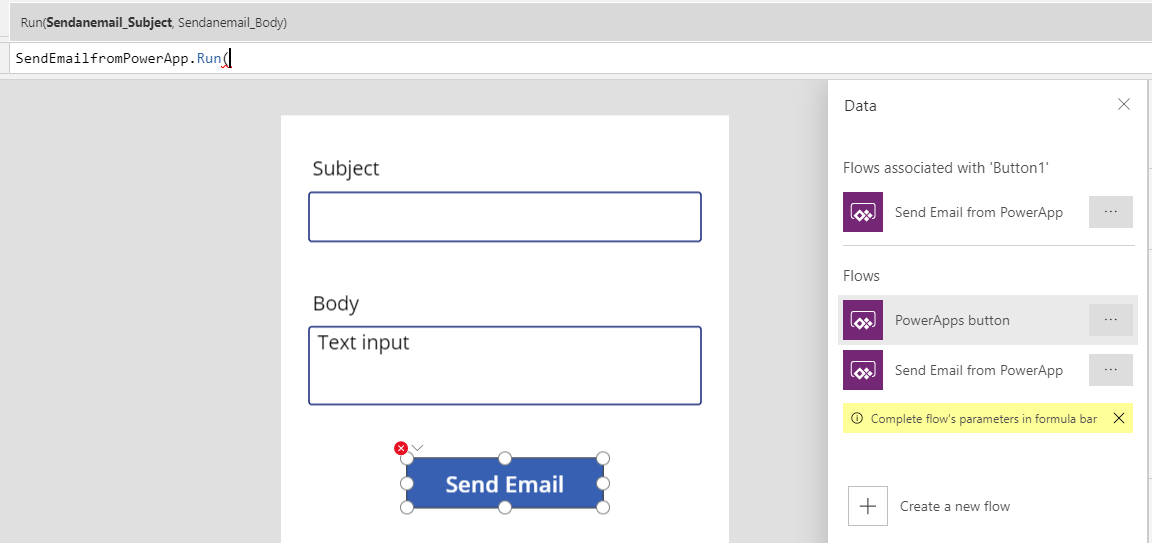
We can now feed the Text value from the first Text Input in for the first value and the same for the second.
![]()
![]()
With this, the PowerApp and Flow should now be integrated. If you run the app, fill in the values and click on “Send Email” your Flow should kick off emailing your recipient with the values you input for Subject and Body.
Read Next: How to Create Filtered Relational Drop-downs with Choices in PowerApps