Microsoft Flow
How to Use Custom Vision Intelligence with Microsoft Flow to Recognize, Identify, and Index Your Pictures, Videos, and Digital Content
Recently, we came across a problem with a constructed Microsoft Flow that takes incoming emails to a Shared Mailbox and posts the information into a SharePoint list. The Flow picks up on attachments and stores those as attachments in the list item created.
The issue: the majority of people include the company logo in their signature, but the name of the file itself would vary, so there was no way to easily filter out the logo in order to not store it as an attachment. This is where the Azure Custom Vision Intelligence came in – you can easily customize your own computer vision models that fit with your unique use cases.
Here are a few examples of labeled images and how Custom Vision can do the work once it’s set up properly.
Custom Vision Intelligence Overview and Setup
Custom Vision Artificial Intelligence allows you to train an AI to perform certain actions.
In this instance, we will be training our Custom Vision AI to recognize the Timlin Enterprises logo. It will tag the images fed to the AI as being the logo or not being the logo. We can trigger the Custom Vision AI and feed it the image we are curious about in a Microsoft Flow.
To start, navigate to https://www.customvision.ai and sign in or create an account*. Once signed in, we will want to create a New Project. Simply click on “New Project” and fill out the prompt as shown.
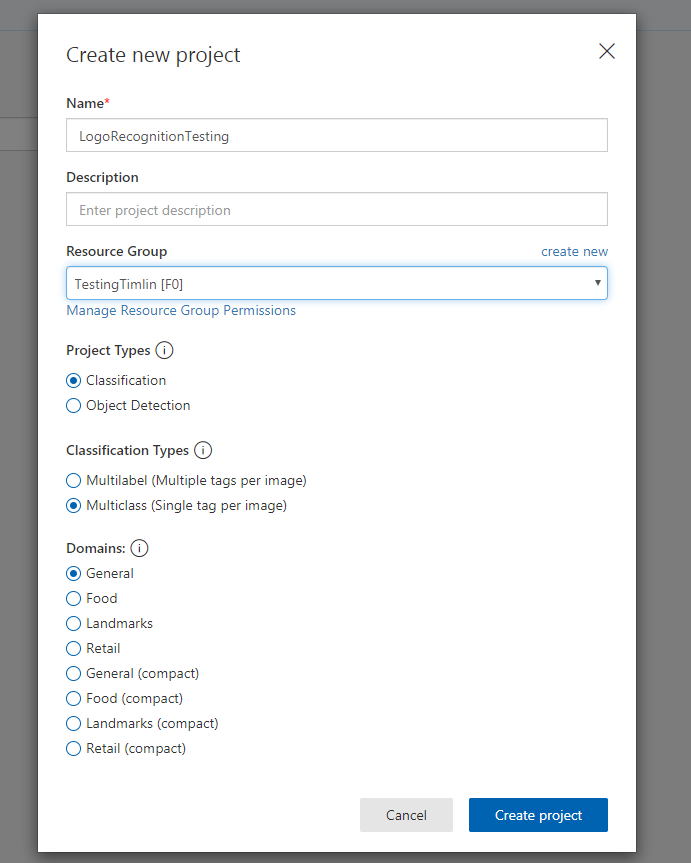
*Note: The account you use should be linked to an Azure Subscription that it has access to. Also, in our example, our Resource Group was already created and set to the F0 Plan (Free Plan). During the original creation process of a new Resource Group in Custom Vision AI, it only allows you to create a new resource group under the S0 plan. If you want to avoid any costs, be sure to switch the plan for this resource group to F0 after creation (this will be shown later on in this post). In addition, the resource group must remain as the South Central US location as the functionality we are using is only available in this location currently.
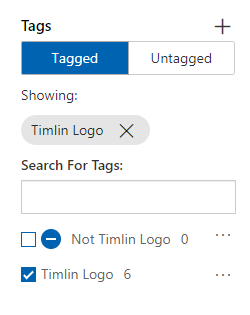
Once you’ve created the project, you want to start off by creating two tags on the left-hand side. One tag can be called “Timlin Logo” and the other can be called “Not Timlin Logo” to keep everything simple. The “Not Timlin Logo” will be marked as negative as images that fall in this category are the opposite of what we are looking for in the logo.
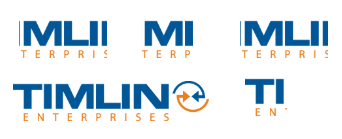
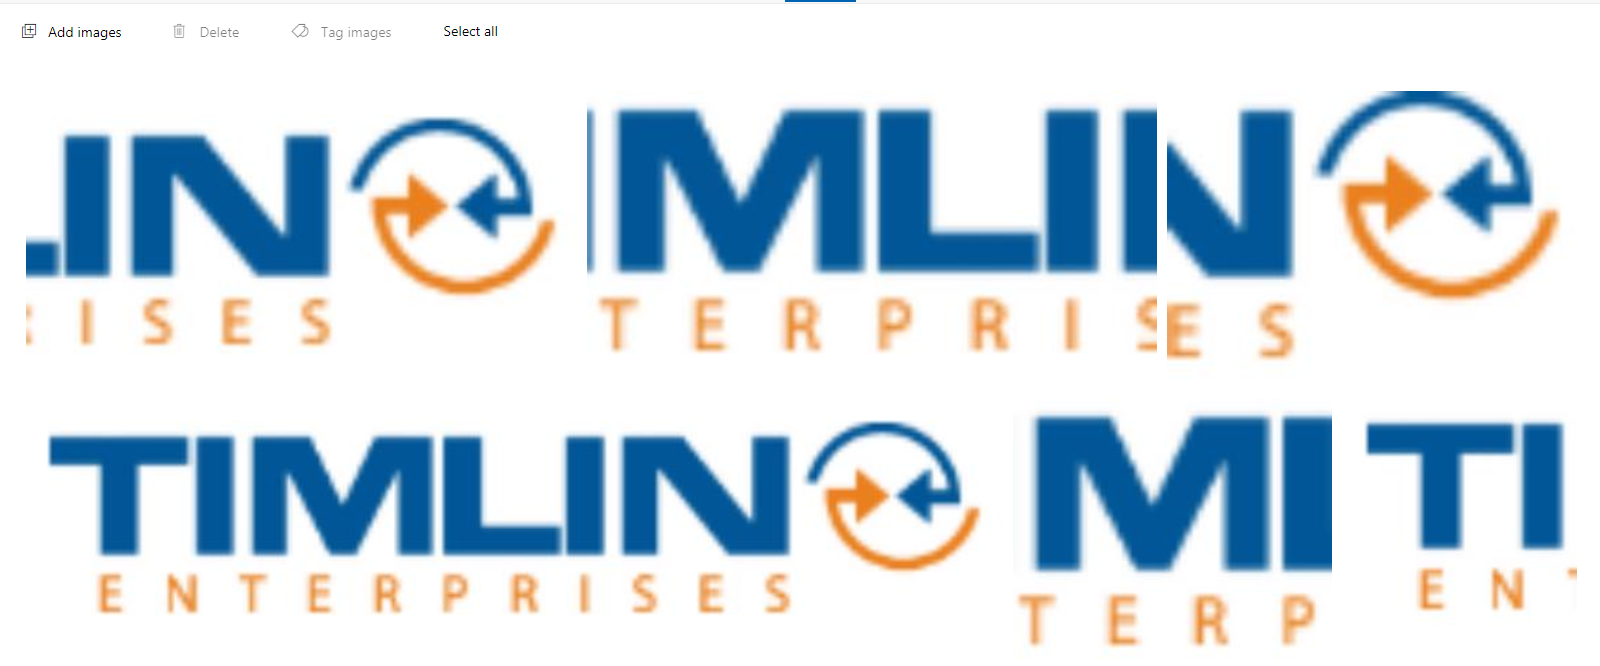
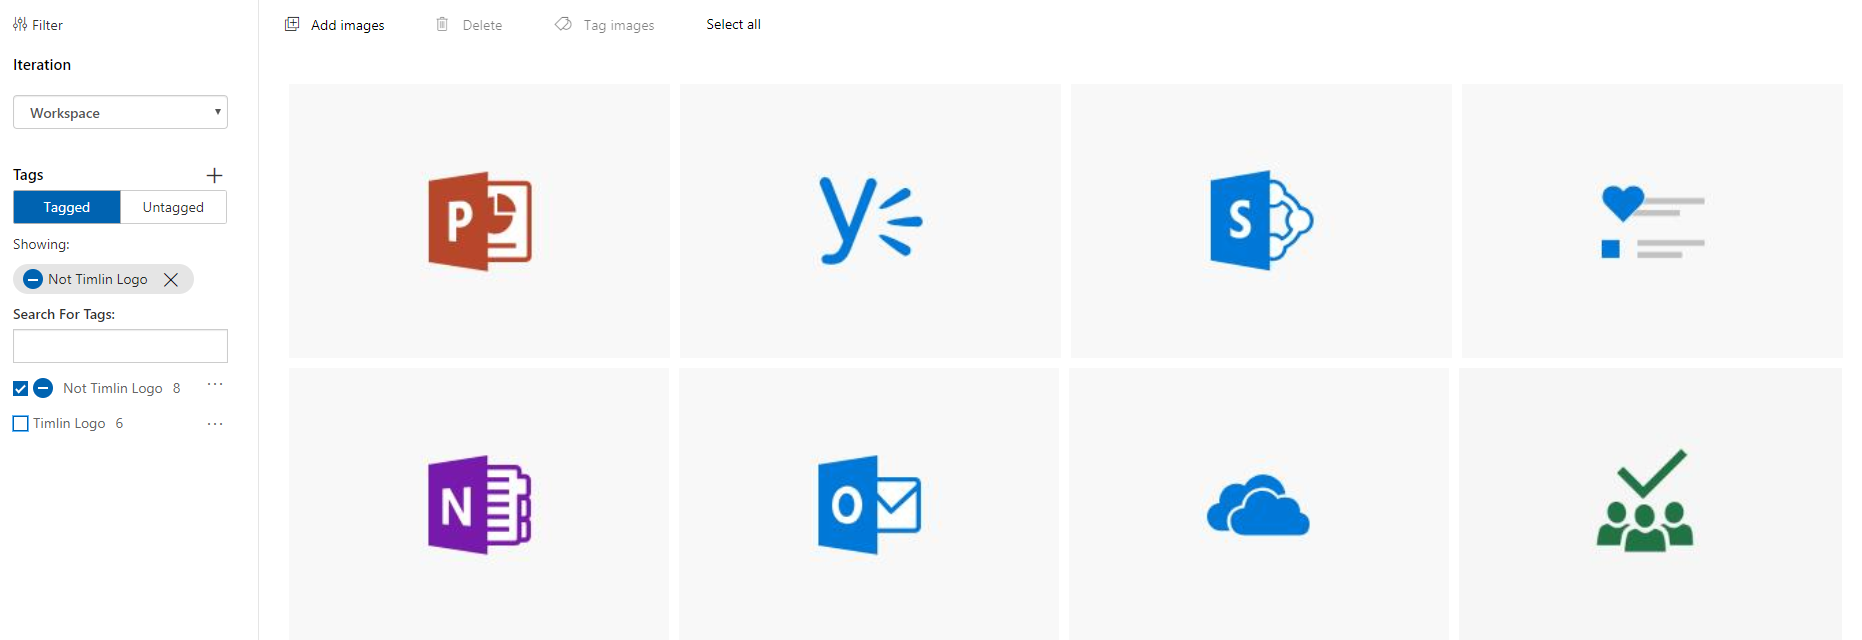
In order to have enough data for your workflow, the AI will require a minimum of 5 images per tag you create. What you want to do is give the AI between 5 and 10 images that either is or look like the Timlin Logo and 5-10 images that look nothing like it. An easy way to do something like this would be to take the logo and slice it into different quadrants (as shown below). Upload each of these spliced sections as separate images into the AI and assign them the “Timlin Logo” tag.
Spliced Images
Spliced Images in Custom Vision AI
Tags
Next, we will want to feed it the Negative images. You can use any image that does not resemble the logo. In this example, I’ve used some stock Office logo images (as shown below).
Training Our Custom Vision Intelligence
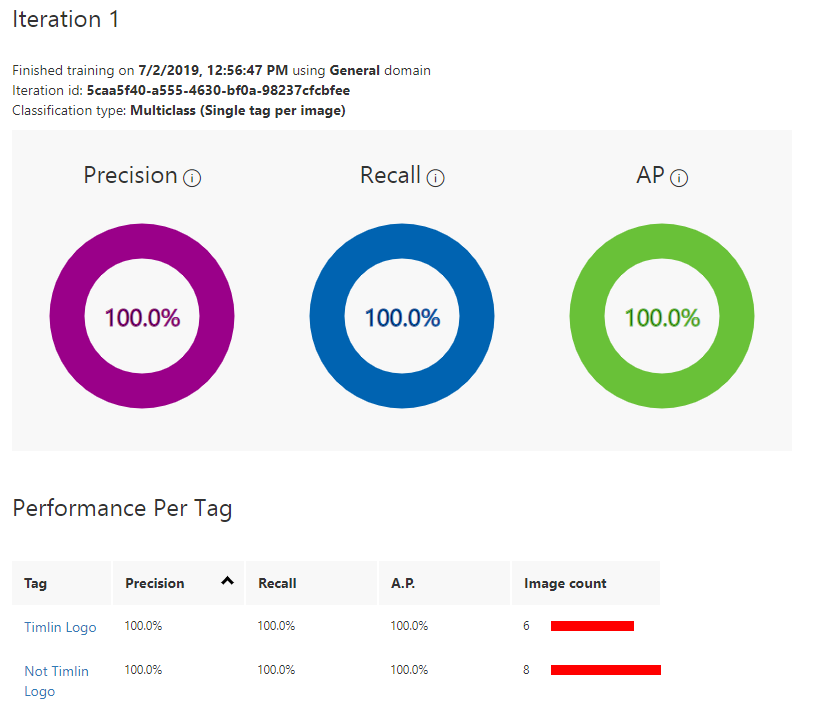
Now that you have your sample data, we can start to Train our AI. To start this process, navigate to the “Train” button at the top left-hand corner.
You are then given two options: Fast Training and Advanced Training. What you are looking for is rather unique and easily identifiable, so you can simply use the “Fast Training” process.
If you were training an AI on hundreds or thousands of images to identify a very particular object/set of objects, you may look into using the Advanced Training process which will train the AI over a specified period of time. For now, select “Fast Training”, navigate to “Train” and wait for the training process to complete. If all went well, you should get your two tags with (most likely) a 100% precision rate in identifying whether an image is the logo or not.
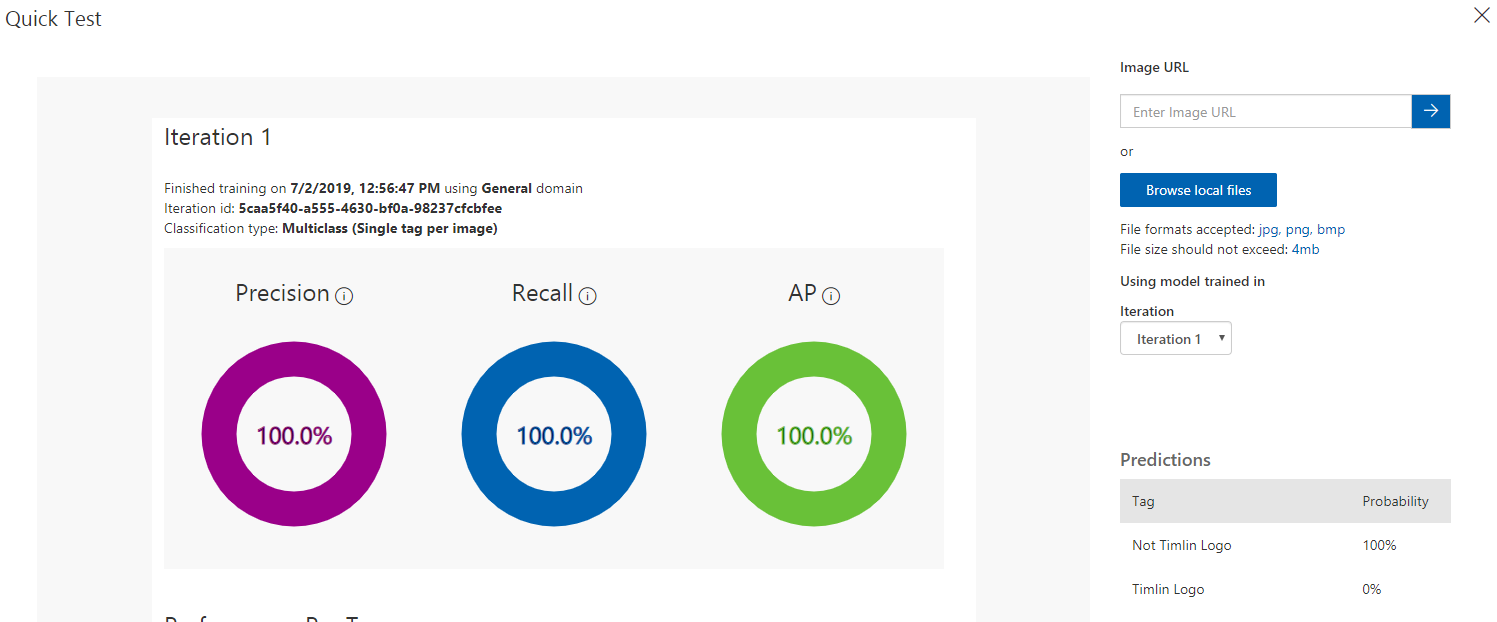
You can test this with other images that aren’t in your sample pool as well. If you click on “Quick Test” you can feed the AI a separate image and ensure that the proper tag is being pulled back. For example, if I feed it the last screenshot referenced in this post, I should receive “Not Timlin Logo” back (as seen below).
Triggering Custom Vision Intelligence from Microsoft Flow
Triggering your Custom Vision AI from Flow and feeding it an image to test is very straight forward.
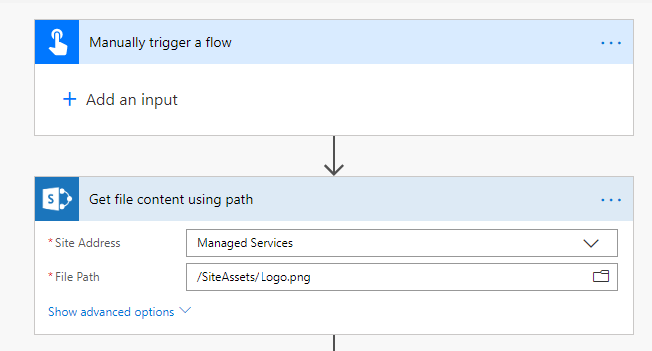
You can start by creating a new Instant Flow (one we can trigger manually). In this example, you will use a file stored in a library in our SharePoint tenant.
To do so, you first get the file content by using the “Get file content using path” function in Flow.
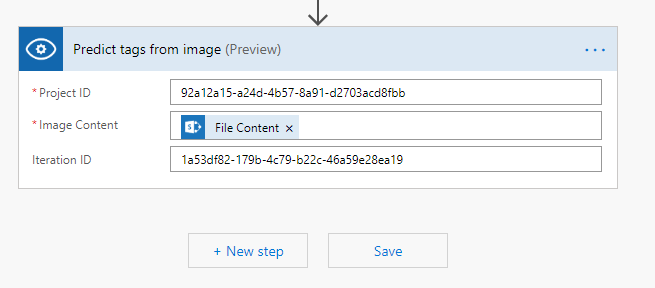
Now that you have access to the file and its content, you can add the action to determine the tags.
Search for and add the “Predict tags from image” action in Flow. You first need to configure the Custom Vision connection. Give the connection a name and your prediction key (found on the settings page of your Custom Vision application). Once that has been configured, the action itself will request your Project ID, which can be found from the Settings page of your Custom Vision AI project, the Image Content (which is the File Content stored in the last action) and you can also input an Iteration ID if no default is set.
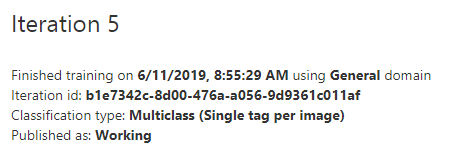
To find the Iteration ID, you can access the “Performance” tab within Custom Vision AI, click on an iteration and copy the “Iteration id” value into the Flow Action.
The completed Flow action will look like the one below.
When run, the Flow should trigger the Custom Vision AI and give you a JSON output that you can use for any future conditions with probabilities assigned to them.
With this, you will have completed your first Custom Vision Intelligence setup with Microsoft Flow integration.
If you have any questions on the setup, or anything else related to Microsoft Flow, let us know. Our team of Microsoft experts is available to help you!