
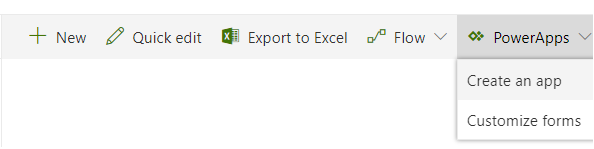
To start, what do I mean by ‘Linked and Unlinked PowerApps for SharePoint’? In short, you can create a PowerApp for a SharePoint list directly from the list itself (as shown below). When doing so, the PowerApp is directly linked with that list and is ready to go for submitting items.
The other way of creating a PowerApp that will handle data submission to your SharePoint list is by creating a blank PowerApp and adding the list as a data source via a Form element.

Each of these approaches has their pros and cons, and we are going to go over these differences, so you can determine which solution works best for whatever it is you are trying to do with PowerApps and SharePoint.
Linked PowerApps
A linked PowerApp will be the easiest and most user-friendly way of creating a PowerApp that is directly associated with a SharePoint list in your environment.
It will, by default, contain all fields that are currently present in the SharePoint list from which it was made. These fields can be removed or hidden at will, but any required fields will need to remain on the PowerApp and its respective form.
One con to this approach is the fact that you are now restricted to using a Phone Layout and only a Phone Layout. There is no out-of-the-box way (currently) to directly create a larger PowerApp (tablet layout) that will be associated with a SharePoint list. You will still have the ability to customize your application in the Phone Layout just as you could customize any other PowerApp, but you will be limited to the phone resolution and aspect ratio. Attempting to increase the application size in app settings will only increase the container, not the content within the application itself.
Unlinked PowerApps
The unlinked approach is a more technical approach to creating a PowerApp for a SharePoint list. This involves creating a blank Phone or Tablet layout PowerApp and adding the list as a Data Source. The easiest and quickest way to do this is to add a “Form” element and set its data source to the list you are attempting to work with.

This approach will grant you the ability to make larger PowerApps that will still post data to your SharePoint list. The main concern here is not being able to create new entries in the SharePoint list, but to edit entries that have already been created.
In a linked PowerApp, the list item will already be fed into your PowerApp and be ready to edit. In an unlinked PowerApp you will need to configure custom parameters that pull in the item that is being selected.
This definitely adds a level of complexity to the form/PowerApp, but depending on how large of an application you are looking to develop, this may still be your best approach.
Interested in this solution for your SharePoint investment and working with the Timlin team? Request a 30-minute free consultation here.

Learning a new technology in itself can be difficult. Add on all of the daily work you and your employees have to do and the quarterly goals you have to hit, and it can be quite the headache to bring in new processes. Even though you know a new technology can speed up productivity, the unknown aspects of adopting it are reason enough to deter you from trying. It’s why you keep doing things the way you’ve always done them.
Organizations try to help by investing in training when adopting a new technology tool, but it’s usually a one size fits all approach. For example, they will hire a trainer, and teams will take courses over the span of several weeks to learn how to use Office 365 tools. But at the end of the training, employees are just scratching the surface of the new tools. With all the resources available, why are they not adopting the new technology?
First, tools like Office 365 are constantly evolving. Second, teams don’t invest in training that offers tailored training, support, and guidance that’s applicable to their departments and day-to-day responsibilities.
At Timlin Enterprises, we believe contextual training is the key to unlock the technology adoption door. Let’s unpack how our approach is encouraging users to embrace Office 365.
Where There’s a Will There’s a Way
First and foremost, employees need to have a reason to learn something new. For example, I don’t just go to my garage and start woodworking. I learn by building something. This would be something simple at first like a birdhouse to learn the basics until I can advance my skills to build a table. Without a goal, most people don’t have the mental energy to apply the knowledge to something that they will retain. This is the main reason generic training fails. Without a specific problem to solve, the material is forgotten.
Awareness is the First Step to User Adoption
It’s crucial to create awareness of new technology within your organization before beginning a training program. If users don’t even know they can use Office 365 for more than email and document storage, they won’t even think about it, much less attempt to use it.
Start by building awareness and knowledge of the tool and its capabilities in a way that’s relevant to employee skill sets, organizational guidance (governance), and areas with small problems. We use past customer experiences to understand what different organizational roles are most likely to need. We talk to Human Resources about document publishing and maintenance, onboarding workflows, and templates for distributing organizational information.
Offering these small sessions targeted at specific types of users and capabilities starts to generate ideas, initial knowledge, and even excitement about Office 365. This is all part of the plan. As long as people know what is possible, and they have been given a conduit to get help, you’ve given them the key to unlock the door.
Knowledge is Power
With ongoing feature awareness in full swing, start working regularly with the teams and departments to talk about inefficiencies, issues in the process, struggles, and generally trying to uncover small elements of their work that could be simple training opportunities. It’s important to bring employees through the training at a comfortable pace. We’ve found that training and support are often intertwined, with more formal training coming out of needs analysis uncovered from common support trends.
For example, we work with end users to solve small problems, showing them exactly what we did, and how the features work. It’s an opportunity to train, teach, and provide a solution all in one instance—the very essence of contextual training. We also discuss those instances internally to uncover patterns that help us understand additional proactive training opportunities. If we see several people with similar issues, we can help solve for that across a larger audience.
The goal here is really to provide practical knowledge, not theoretical capabilities. New knowledge only sticks when the user has a vested interest in learning, such as when they need a solution to complete an important task.
The Building Blocks of Digital Transformation
Contextual training and user adoption are essential as you work to achieve digital transformation within your organization. It’s a building-block approach to learning. Users can’t absorb too much information all at once. Instead, implement a contextual training program that spans several months, so users can focus on specific training that relates to their specific job and processes.
Empowering users with knowledge of the tools to solve specific problems is what impacts real change. By continually adding to their day-to-day capabilities, employees will use Office 365 more often and will eventually consider it an essential part of how they work.
Compared to pre-built training, videos, books, or intense training classes, a contextual approach really adheres to the principles of digital transformation and true learning. By investing in contextual training, you’ll see user adoption and engagement of Office 365 soar within your organization.

SharePoint Framework – Passing The SharePoint Context Object
The SharePoint context object can give you a lot of crucial information about the user currently logged in, the page that a user is on, templates being used, and more.
By default, when working in SharePoint Framework, by default, you will have access to the context object within the most parent component.
In this case, the component is the BaseClientSideWebPart component. For the most part, we will want to keep each component in our projects clean and, as we don’t have access to state in this component, we will want to pass context down to the next highest child component. This child component will technically become the parent component to every other component in our project as it will handle most of our data operations (this can also be a service if you would like).
Passing the Context Object Down
A very important use case for employing the context object is being able to utilize the spHttpClient that will grant us access to SharePoint’s REST API in the context of the currently logged in user.
The easiest way to do this is to pass the context object as a whole down as a member of props. When creating a project in SharePoint Framework (as a Web Part project), it will generate a main .ts file (the BaseClientSideWebPart) and a single component with the .tsx syntax.
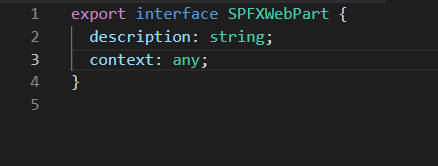
In addition, a Props file for that .tsx file should also be available. We will first want to add a line to our Props file for the context object we will be passing. Simply define “context: any;” in the Props file, and we should be done here (as shown below).
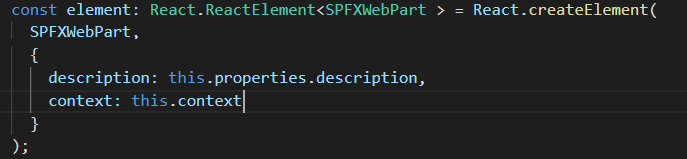
Now that our Web Part has the property available, we can head over into our root .ts file to pass the context object down. To do so, simply define the prop “context: this.context” in the React.createElement statement (as shown below).
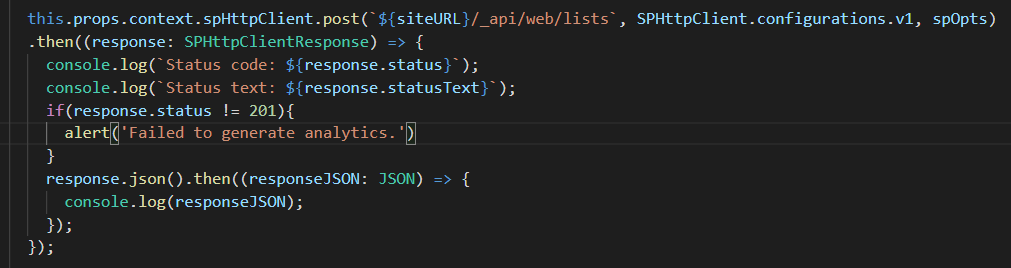
Our context object should now be available in our SPFXWebPart. To test this, we can make a simple REST API call to get the current site’s lists. Add the code shown below into the constructor statement of your web part (you may need to add the constructor if you did not already).
The site URL variable can either be defined or replaced with plain text. It can also be removed completely to make a relative call to the site it is deployed on.
If the call comes back with the expected data, you have successfully passed the SharePoint context object down through your web parts in SharePoint Framework.
Interested in this solution for your SharePoint investment and working with the Timlin team? Request a 30-minute free consultation here.
Timlin had the opportunity to create a knowledge management system for a client using SharePoint Online. One of the requirements was to use item level-permissions to control access based on metadata. We used Microsoft Flow to satisfy this requirement and provide the client with a low-maintenance process along with tracking and visibility.
The Setup
To get started, a Document Library entitled Articles was created. The library contained metadata to indicate Visibility, as well as a lookup to a Department’s list. The Department’s list was a list of each of the company’s departments, with an additional Text column to store the AD group associated with that Department.
The rules to be implemented were: If the Visibility is Public, grant everyone access to see the document. If the Visibility is Confidential, only members of the tagged Departments would have access to view the document. In order to prevent any visibility into Confidential documents, the initial permission for all items did not include the Visitors group.
The Flow
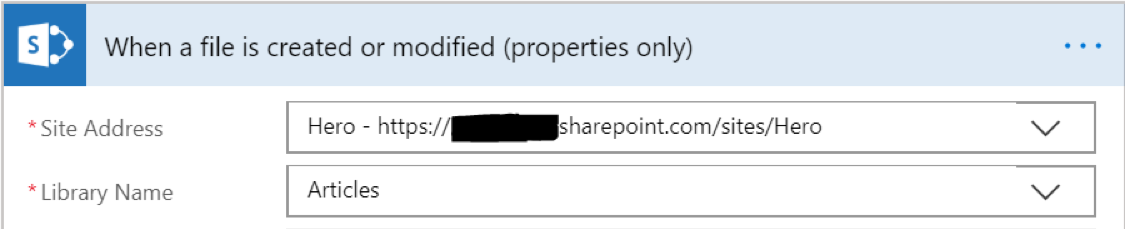
To begin, a Flow was created using the “When a file is created or modified (properties only)” trigger, specifying the Articles library as the source Library Name.
Two Integer variables were initialized to hold values needed later.

In order to grant access to Visitors, we need to retrieve the principal for the site group. This is accomplished using the “Send an HTTP request to SharePoint”. This Action allows you to send a fully authenticated request to the SharePoint APIs.
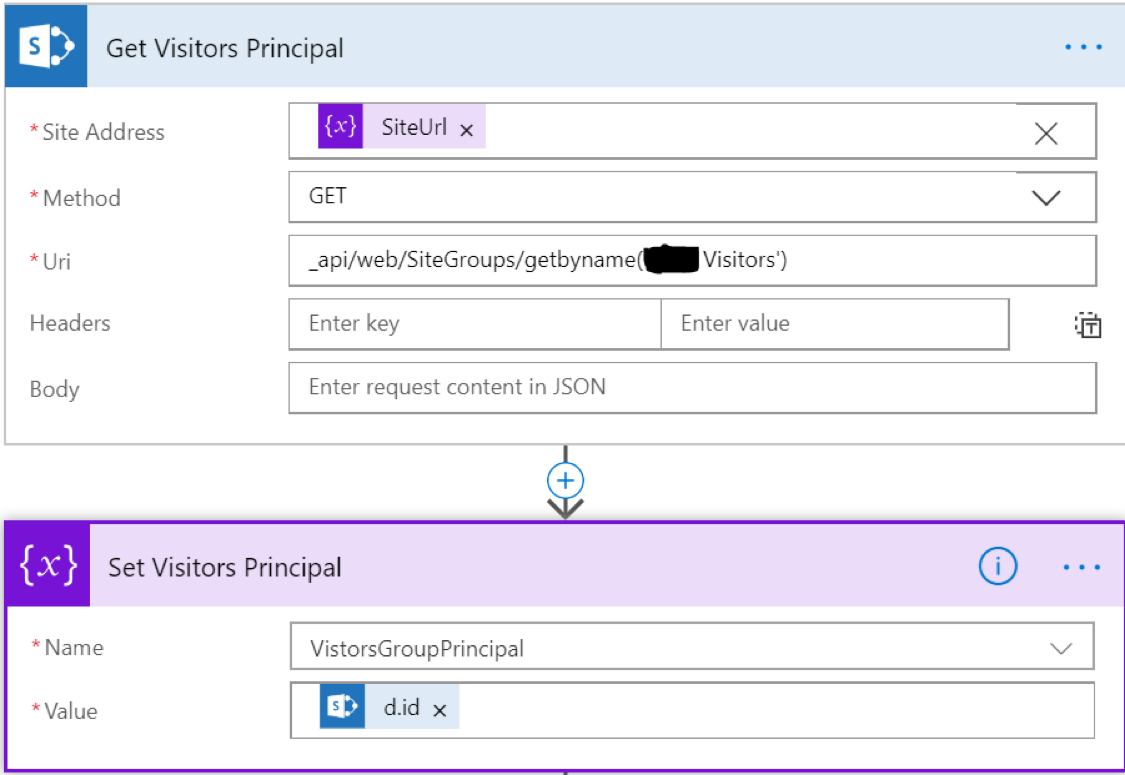
In this case, we use the SiteGroups/GetByName call to get the Visitors group. We then store the value in the variable we stored. Based on the way the JSON data is returned, we want to set the variable to the value in [‘d’][‘id’].
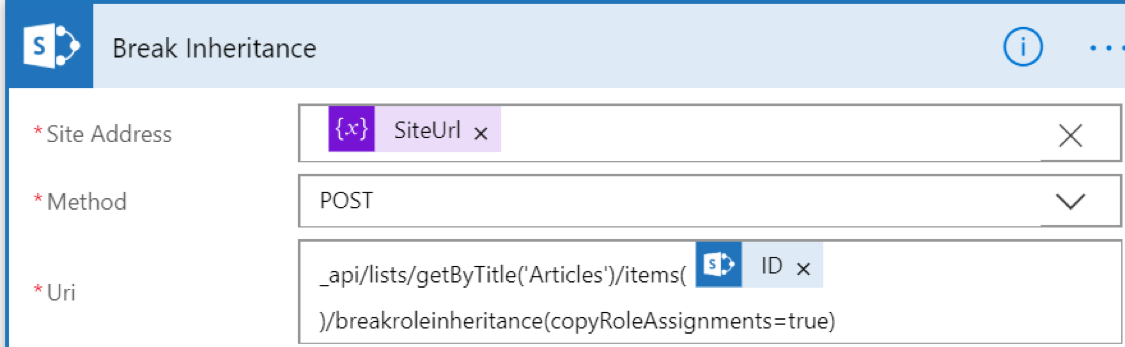
Next, we use the same component to break inheritance using the BreakRoleInheritance POST request on the item, using the ID from the original trigger.
We’ll use the Get Items action to retrieve all the values for the Department’s list. We’ll use this later to ensure we clean up properly.
To get started on setting permissions, we’ll use the Switch control to determine what action to take based on the Visibility column. For Public visibility, we’ll grant access to the Visitors group using the same HTTP Request action from before.
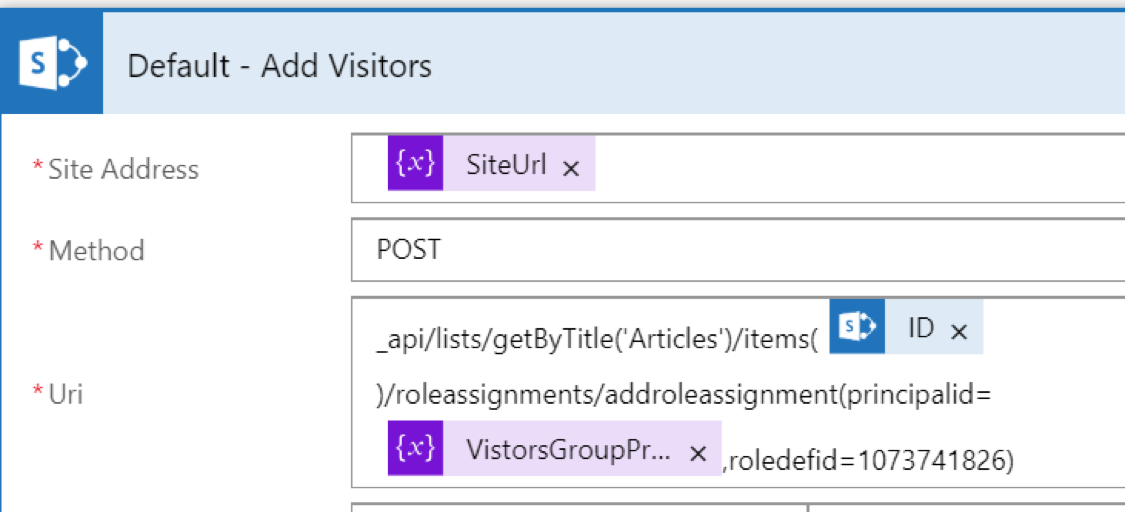
We’ll use the RoleAssignments/AddRoleAssignment method on the item to add the Visitors group we looked up earlier.
Note: to get the RoleDefId for the permission level you want to set, you can use the /_api/web/RoleDefinitions endpoint to retrieve all roles for the site collection. Look for the Name element of the desired Permission Level and find the corresponding Id value. In this case, we use 1073741826 which is associated with the Read permission level.
We have much more work to do for Confidential documents.
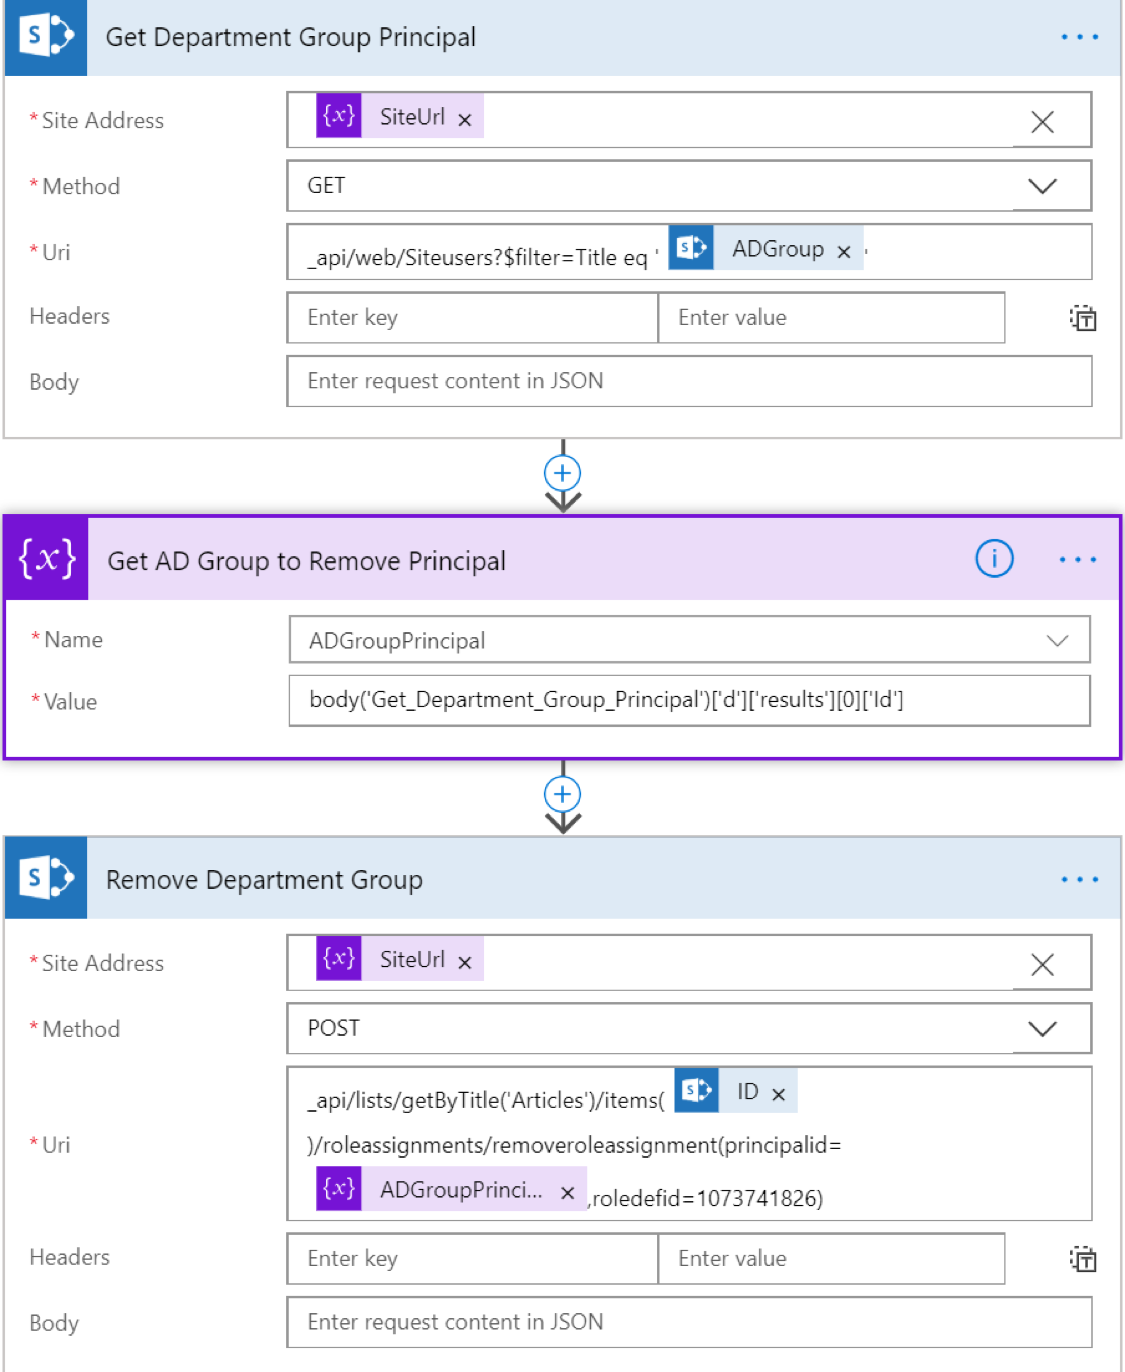
First, we want to remove any existing Department Group assignments. We’ll use an Apply To Each action to iterate over the Department’s list we retrieved earlier. We need to get the Principal for that group, similar to how we retrieved the Visitors group, and use the RoleAssignments/RemoveRoleAssignment method to remove any permissions for that group/permission level.
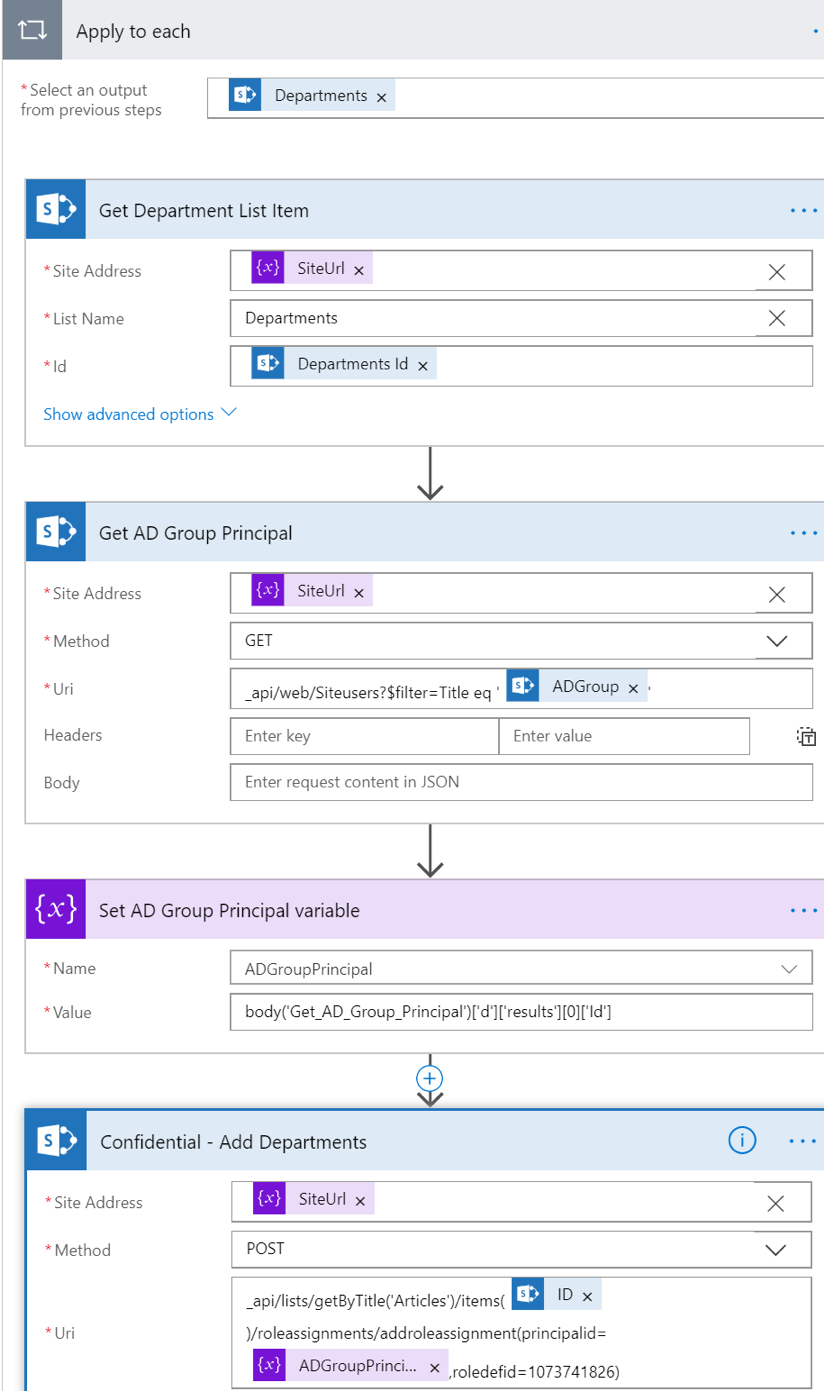
Once removed, we’ll again iterate, this time over the departments associated with the Article. We’ll retrieve the full Department item using the Get Item action, so we can find the corresponding AD Group associated with the Department. We’ll store that value and once again use the RoleAssignments/AddRoleAssignment method to grant Read permission to the item.
Upon execution, any items added or modified will have the appropriate permission level set based on the Visibility and Department values tagged by the author.


Something that you’ll notice with SharePoint Modern pages is that they currently limit you to a restricted with container centered in the page.
The modern experience does have a full-width container on specific pages, but only certain web parts can be added to this area (the Hero and Image webparts). With SharePoint Framework, you can make web parts that are marked as being eligible for the full-width container but that doesn’t help you if you want web parts that already from with the Modern experience.
Making your Modern Pages Full Width
Before we continue, I want to make sure that it is noted that the method detailed in this article is not supported by Microsoft at this time. However, the method used will cause no harm to the environment or your page structure and is merely an easily implementable web part.
To start, create a new SharePoint Framework project using the yeoman generator. If you have not done this before, please refer to the documentation here for instructions on how to do this.
We are going to use this web part globally across the tenant so ensure you give it a name you’ll recognize. The name we will give it for this exercise is “Full Width Web Part”.
Once all of the solution files have completed downloading, open up the solution’s code with “code .” in your command prompt (while in the directory the project was created in). This will open the solution inside of Visual Studio Code. To start, we will need to install the npm package for jQuery.
To do so, type “npm install jquery –save” in your command prompt. This will download and load the package into the dependencies of your project.
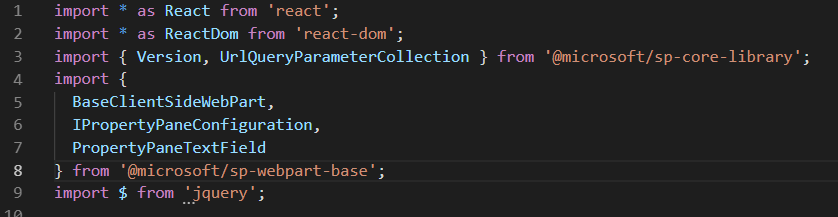
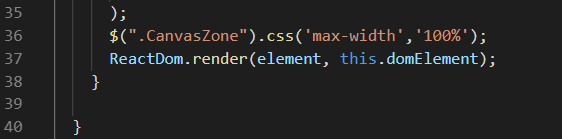
From here, we will want to import this dependency into the root BaseClientSideWebPart of our project. Add the line “import $ from ‘jquery’;” after the last default import statement in the file, as shown below.
Next, we merely need to add a single line to the render statement on this same file. Add the line “$(“.CanvasZone”).css(‘max-width’,’100%’);” right before the ReactDom.render statement, as shown below.
At this point, we’ve done all we need to do in the code. Bundle and package the solution for deployment in your SharePoint App Catalog (using gulp bundle –ship and gulp package-solution –ship).
*Note: To use the –ship production pipeline, you will need to have enabled the public CDN for Office 365 in your tenant. If you have not done this or are not sure if it is enabled, review the instructions here.
Once the package is deployed, simply add the “Full-Width Web Part” that we just created and deployed to any modern page that you want to have a full-width container and we are good to go.


Effectively supporting a platform as extensive (and complex) as Office 365 is challenging, and you need to know the resources in place are up to the task.
It’s why we made an intentional decision when we introduced our new Office 365 Center of Excellence Managed Services to continue our approach of using only US-based support resources. An offshore approach is often in direct opposition to the goals of our company and our clients.
Digital transformation requires collaboration, automation, and task efficie
cy, and it relies heavily on clear and trustworthy communication among key stakeholders of an organization, their teams, and their vendors. I have had countless conversations with business users and owners who are frustrated with poor customer support and then turn to Shadow IT as a result of their poor experiences.
This trend of short-term cost-savings by using less expensive resources overseas has permeated beyond its original usefulness.
There is a place for offshore work, but directly engaging with business users to assist with the training, support, and implementation of Office 365 tools and capabilities is not one of them. Why? Because the successful adoption of Office 365 requires a change in people, NOT technology.
You need the right tools for the job, and this job is about applying the right people to the process. Business users are listening only at a point when they have a need.
If there is a communication, culture, or technical barrier at that extremely impactful point in time, there is a chance you lose the opportunity to solve that organization’s problems.
I look at each and every one of those moments as the most critical aspect of digital transformation. If we can help that one user in that instance, some small magic happens: We gained a little more of their trust. We gave them some knowledge they lacked previously. They use the tools a little more than yesterday. They might tell their colleagues about this.
However, if the situation ended poorly, it can have a big and negative impact on the business as a whole. With the wrong people assisting your business users, you’re probably moving the needle in the wrong direction.
This applies to more than offshoring, it applies to poorly skilled support staff in general. It all adds upon the same — if your business users don’t receive the required experience during the overwhelming majority of their direct encounters, you are most likely doing more harm than good.
If your organization cares about digital transformation, keep this in mind as you build your plan to actually enable your broader workforce to adopt these tools. And if you’re interested in how we deliver expectational services by using only US-based services, learn more about our Office 365 Center of Excellence approach here.


Nintex Workflow is a fantastic tool that can help streamline numerous processes and solve a variety of business needs.
One caveat to the heavy use of Nintex in an On-Premises SharePoint environment is that the more it is used, the faster each Nintex Workflow History list fills up.
Nintex gives you a couple ways out of the box to purge these lists:
- Use NWAdmin.exe and its respective “PurgeHistoryListData” command to clear the list.
- Use the GUI available to you within Central Admin.
However, when these lists get too big (30, 40 or 50,000 records), these methods often fail. If they do not fail, they can take hours and sometimes days to complete. In the meantime, your Nintex Workflow History list is inaccessible and cannot be used to parse logs.
This is where the SharePoint REST API can help you. Let’s dive into the details so you can easily clean your history list.
Prepping Your Browser
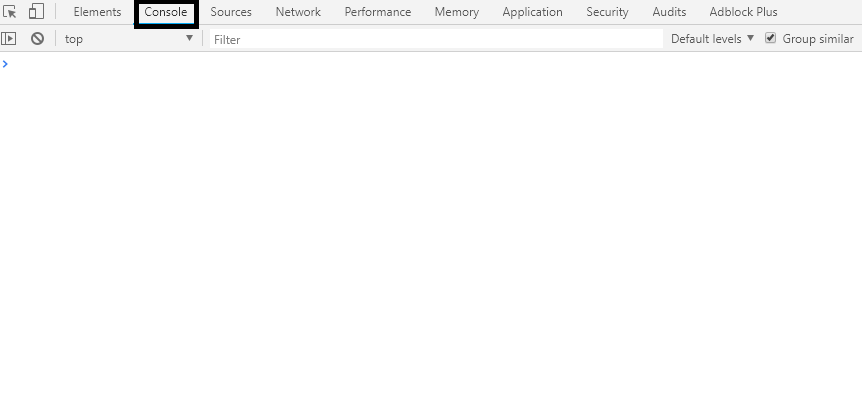
I find that the easiest way to take care of this issue is by using Chrome and the Developer Console to use a couple of functions that assist in removing the history records. The scripts that will be posted below require jQuery to run. Not all SharePoint environments/pages will have jQuery readily available, but we can load jQuery into the page we’re using right through the console. To do so, open your Chrome developer console (F12 key) and select “Console” as shown below.
var jq = document.createElement(‘script’);
jq.src = “https://ajax.googleapis.com/ajax/libs/jquery/2.1.4/jquery.min.js”;
document.getElementsByTagName(‘head’)[0].appendChild(jq);
Next, we can inject jQuery into the current window by copying and pasting the following code into the console and hitting Enter. At this point, jQuery should now be available for use in our current window.
Purge Functions
Next, we can look into the functions that will be assisting us in purging these lists. There are two main functions, deleteOldHistory and an ajax call that will run in conjunction with the first function. I will put these two functions below and we can discuss them.
Ajax Function
$.ajax({
url: _spPageContextInfo.webAbsoluteUrl + “/_api/Web/Lists/GetByTitle(‘NintexWorkflowHistory’)/Items?$top=5000”,
type: “GET”,
cache: true,
contentType: “application/json;odata=verbose”,
headers: {
“accept”: “application/json;odata=verbose”,
},
success: function(result) {
var results = result.d.results;
var count = 0;
for(var i = 0; i < results.length; i++){
var lastModified = new Date(results[i].Modified);
var todaysDate = new Date(‘2018-01-01T20:51:31Z’);
if(lastModified < todaysDate){
deleteOldHistory(results[i].ID);
}
}
},
error: function (error) {
console.log(JSON.stringify(error));
}
});
Delete Old History Function
function deleteOldHistory(id){
$.ajax({
url: _spPageContextInfo.webAbsoluteUrl + “/_api/Web/Lists/GetByTitle(‘NintexWorkflowHistory’)/Items(“+id+”)”,
type: “POST”,
headers: {
“ACCEPT”: “application/json;odata=verbose”,
“content-type”: “application/json;odata=verbose”,
“X-RequestDigest”: $(“#__REQUESTDIGEST”).val(),
“IF-MATCH”: “*”,
“X-HTTP-Method”: “DELETE”
},
success: function (data) {
console.log(‘deleted’);
},
error: function (error) {
console.log(JSON.stringify(error));
}
});
}
To start, we will want to add the deleteOldHistory function in the Chrome console first as the ajax call requires this function to work. This function is essentially being fed list item IDs from the history list that it will use to delete each item.
Next, the ajax call is the most important part. There is one main variable that we want to pay attention to and edit per your need, todaysDate. The todaysDate variable defines the date in which you want to delete records up until. So if you wanted to delete all records currently present but preserve records that are newer than 09/18 then todaysDate would be set to ‘2018-09-18T00:00:00Z’.
This means that the Nintex Workflow History List would be purged of all records that have a modified date less than that of the 9/18 date. As a side note, you will notice that the query uses the query property $top=5000. In this case, the script deletes records in batches of 5000 and will most likely need to be run multiple times to clear the list completely. However, instead of taking 6+ hours per batch of 5000 it should only take about 2-5 minutes. Simply execute the same ajax command in the Chrome console until you’ve removed all desired records.
Checking the Current History List Count
Unlike other lists in SharePoint, the Nintex Workflow History List doesn’t give a readily available count of all the items it currently has. While still utilizing the Chrome console you can run a quick ajax query (as shown below) to pull back the current count of items. This will give you a good idea of how many records are left and how many more you have to delete.
Check History List Count
$.ajax({
url: _spPageContextInfo.webAbsoluteUrl + “/_api/Web/Lists/GetByTitle(‘NintexWorkflowHistory’)/ItemCount”,
type: “GET”,
cache: true,
contentType: “application/json;odata=verbose”,
headers: {
“accept”: “application/json;odata=verbose”,
},
success: function(result) {
console.log(result.d.ItemCount);
},
error: function (error) {
console.log(JSON.stringify(error));
}
});
From here, you should be finished, and your workflow history list will be clean. And hopefully, this helps you save some time on this administrative task. As a side note, it is still a good idea to purge records from SQL as per Nintex’s recommendation. This process can be found here.
Read Next: Enhancing Nintex Forms with Javascript

Secure Score metrics are an important guideline used to ensure security and performance across your Office 365 tenant. Secure Score analyzes your Office 365 organization’s security based on your regular activities and security settings and assigns a score. Think of it as a credit score for security.
A few tasks in the Secure Score toolbox are repeated tasks of reviewing certain logs within Office 365 and Azure. These tasks are typically repeated on a weekly or monthly basis. In this article, we will discuss how to automate a couple of these review tasks. By the end of this article, you should have a good understanding of how Azure Automation is used and how you can continue to use it to help streamline your Secure Score efforts.
Creating an Automation Application
Our first step in the process is to create an Azure Automation application.
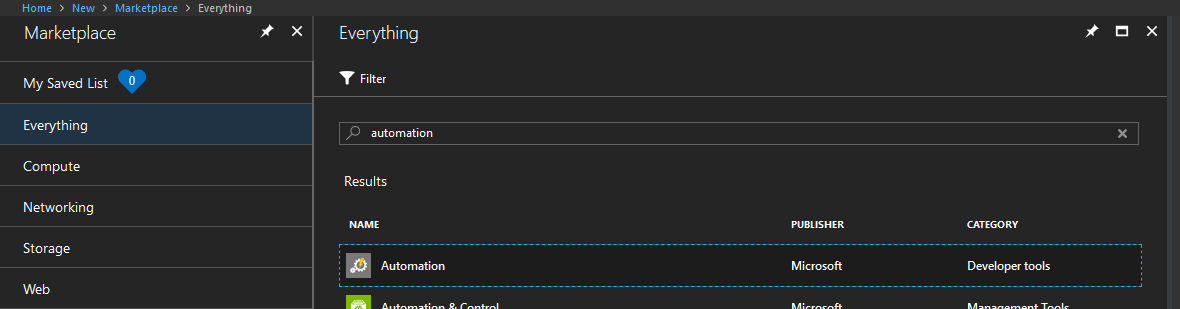
Navigate to your Azure portal (https://portal.azure.com), click on “Create a resource”, search for “Automation” and click on “Create”.
Please note that provisioning a Microsoft Bot, Azure Active Directory Application, App Service, and other Azure resources will result in associated costs. In order to fully understand the associated costs that may incur from following this guide, please refer to the Azure Pricing Calculator which can be found here.

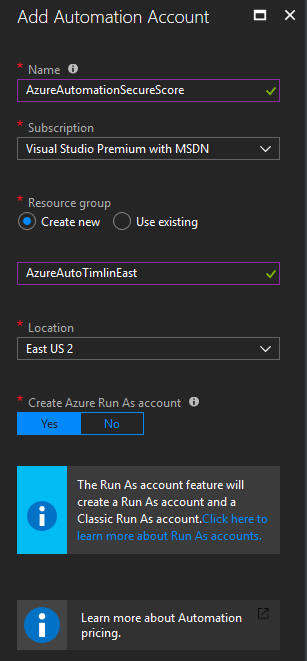
In the configuration menu, give the Automation Account a Name, select the appropriate Subscription based on your tenant, select “Create New” or “Use Existing” Resource group, and then select the appropriate Location. The last option to “Create Azure Run As account” is not necessary in this guide but is something you may want to utilize in the future, so we can leave this set to “Yes”. This account can be used to automate Azure specific functions. These are functions that you can run within the Azure CLI (not functions such as Exchange/MSOL commands). When finished, click on “Create” to create all the required resources.
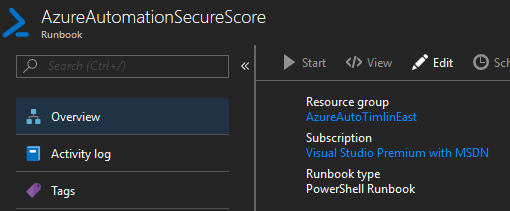
When all resources have finished provisioning, click on the “Go To Resource” button in the notifications area to go to our new Automation resource or search for it in your resources list.
Once there, navigate to “Runbooks” in the “Process Automation” section.
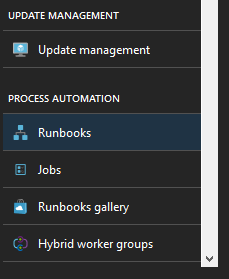
By default, these resources are provisioned with example runbooks. The runbooks here are using the various methods of creating an automated function such as Python, PowerShell, and the Graphical Interface provided by Microsoft. We can ignore all of these examples, but feel free to look at them later on as they provide a good insight into everything we can do with Azure Automation.
Creating Our Runbook
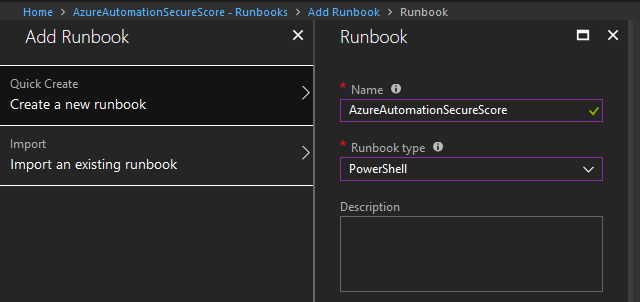
While still in the Runbook section, click on the “Add Runbook” button.
In the new menu that appears, click on “Quick Create”. You will need to fill in two values here: the Name of the runbook and the platform or Runbook Type in which we will build it. Type in the name of the runbook that you would like, and select PowerShell as the Runbook type.
Before we jump into the code of the runbook, we need to set up the credentials that we will use for automation. The account that we use will need to be an Exchange Administrator, have the Discovery Management role in Exchange, and not have MFA configured on the account (unfortunately, there is no way to handle this automation on an account with MFA just yet, but this may change in the future). We recommend provisioning an Azure Service Account that you can use for this functionality. This will ensure that you don’t have an overly provisioned account that is currently being used for other things in your tenant.
In the Automation Resource section, scroll down to the Shared Resources section and click on “Credentials”.
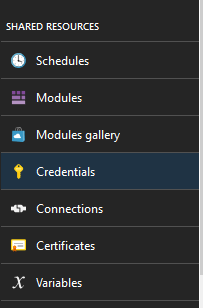
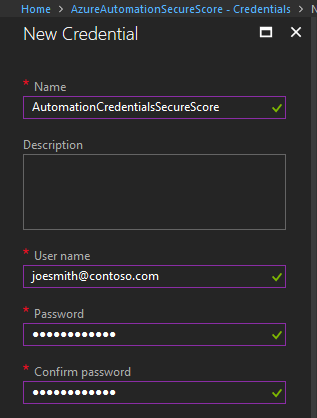
Once there, click on “Add a Credential” and fill in all of the required fields. The name of this can be whatever you’d like it to be. This will be used to reference this set of credentials within the code. The username and password should be one with the roles defined above and should follow standard login standards for Office 365 such as joesmith@contoso.com.
Coding our Azure Automation Runbook
Navigate back to the runbook you created earlier.
Once there, click on the “Edit” button to edit the code within.
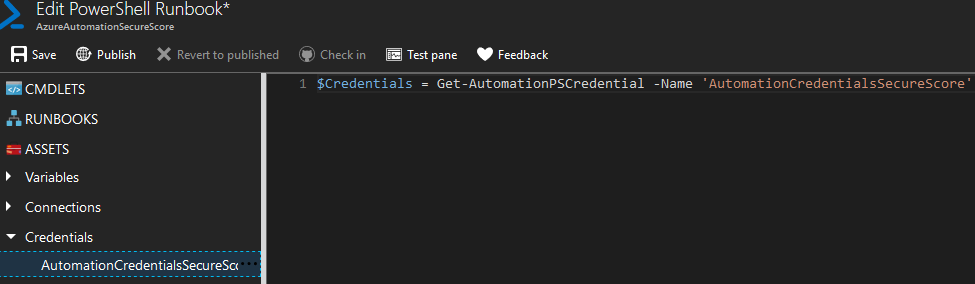
Our first step is to grab the set of credentials we stored in our application earlier. To do so, use the dropdown on the left-hand side for “Assets”, click on “Credentials”, and you should see the credential object you created.
Use the … menu to “Add to Canvas”. This should then give you the PowerShell needed to pull the Credential object. We will also store this as a variable as shown below.
In this article, we will be covering how to automate two Review processes in the Secure Score toolbox. These are mailbox auditing and mailbox forwarding rules. Mailbox auditing needs to be automated as it will only affect users currently in your system. Any users added after this command is run will not have Mailbox Auditing enabled and therefore you will receive no points on Secure Score. The review of Mailbox Forwarding rules is something done weekly, and with this process automated you should always receive the Secure Score points for this task. We will first need to connect our runbook to the necessary areas of Office 365. These will be the ExchangeOnline and MsolService connect prompts. I will be posting the remainder of the code required for this runbook below and will break down what each piece is doing afterwards.
#Connect to Azure Automation
$Credentials = Get-AutomationPSCredential -Name ‘AutomationCredentialsSecureScore’
#Connect-MsolService -Credential $Credentials
The first function exists to connect to Exchange Online Management via PowerShell. As we are looking to take care of the Mailbox Auditing as well as Mailbox Forwarding, we give it the commands you see in the $Commands array. We specify the commands for performance reasons as there is no reason to load every single Exchange Admin command here. The next few lines utilize this function as well as the standard Connect-MsolService command to connect to both services using the credentials object we grabbed earlier. Once connected, we first take care of mailbox auditing.
The code between lines 22 and 29 are set up to take care of Mailbox Auditing. These lines will loop through all users in the tenant that do not currently have Mailbox Auditing configured and setup auditing on them with a time frame of 365 days.
Next, we take care of compiling all forwarding rules that are reviewed within Secure Score. Lines 31 to 47 take care of this task and store all User Inbox Rules, User Delegates and SMTP Forwarding rules inside variables we use next. Lines 49 to 87 serve the primary purpose of reporting. These lines are set up to utilize the Send-MailMessage function to send out an email to whomever you specify (group or single user) for them to review everything this script has done. The content of the email will be all users (if any) that now have Mailbox Auditing configured that did not have it before. In addition, it will send three attachments which are the output of all User Inbox Rules, User Delegates and SMTP Forwarding we stored earlier. Once the code has been implemented, publish the current revision and we are ready to set up our schedule for this runbook.
Scheduling our Runbook
Navigate to the overview of the current runbook we have been working on. Scroll down to the “Resources” section and click on “Schedules”. From here, click on “Add a schedule” to implement a schedule for this runbook.
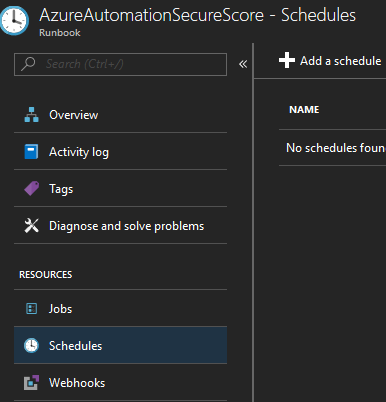
Once here, click on “Link a schedule to your runbook”, then on “Create a new schedule” and finally fill in all required fields. We will want this runbook to run weekly, so set up a time in the future that you’d like to start the schedule on, select “Recurring” and have it repeat once each week on the day of your choosing. For the foreseeable future, we won’t want this expire so leave the “Set expiration” option to “No”.
Once this has been completed, the setup of your Azure Automation resource and its runbook will run once a week, take care of a couple of your Secure Score review tasks automatically, and email your administration the report for review.
The future is digital. Every company, irrespective of industry, is, or will soon be, thinking and operating like a digital company, re-engineering operations to support the new speed of business. If you’ve invested in Office 365, you have the capability to execute your own digital transformation. Enabling and sustaining that capability, however, can be challenging for even the largest organizations.
Just maintaining deep knowledge on the entire platform and understanding the implications of each tool and every enhancement on your environment alone can be daunting. It’s why taking the “if you build it they will come” approach to Office 365 is simply destined for failure.
That’s why we developed an alternative, managed approach – the Office 365 Center of Excellence. We approach digital transformation as a process, instead of a project. Our proven methodology is made up of six pillars which we’ll explore in this blog post and will show how you can achieve the maximum success of your Office 365 investment with a Center of Excellence approach.
What is a Center of Excellence?
The Center of Excellence is a proven process methodology that provides solutions beyond standard managed services by utilizing six services areas to improve and execute on digital transformation in Office 365 and SharePoint. Through this process, Office 365 becomes an extremely powerful business productivity solution that if used and supported correctly, can greatly improve innovation, deliver business value, protect your internal and external data, decrease reliance on email, and further empower your employees.
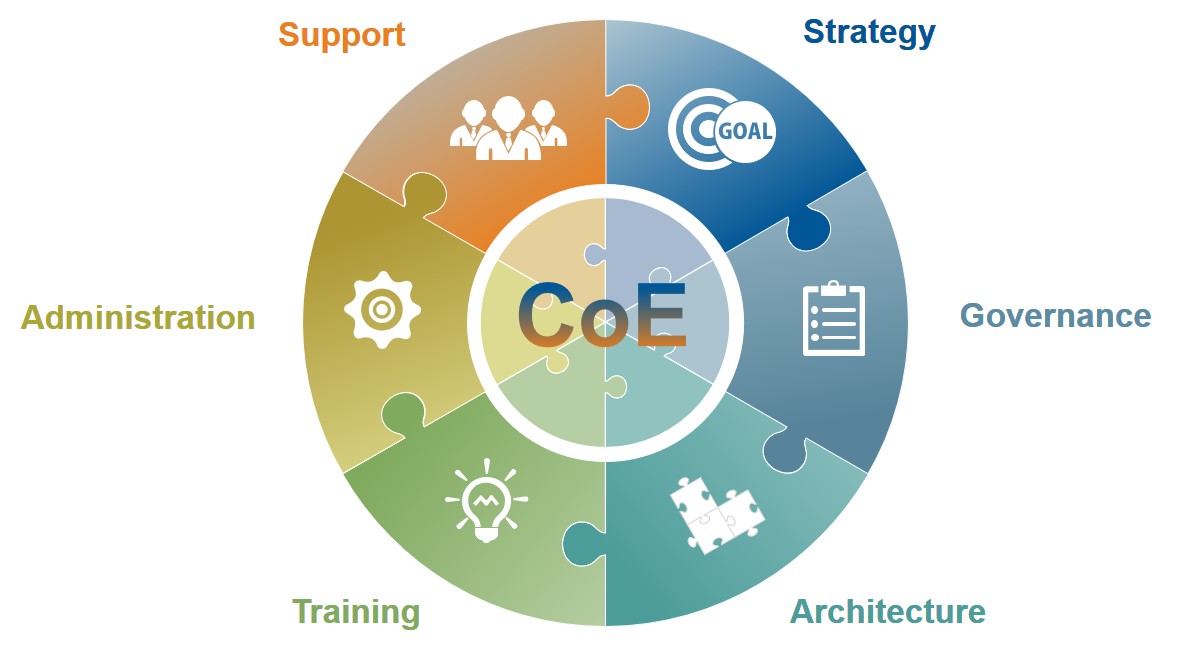
Six Pillars of a Successful Office 365 Center of Excellence
The power of the Center of Excellence (CoE) comes from combining the right skills, activities, and commitment and focusing them on your organization’s goals. There are six service areas that require focus for a successful Office 365 CoE, and communication is their underlying foundation. Let’s take a look at each service area:
- Strategy
Strategy is critical to success because it forces your organization to define what you need instead of expecting the technology to solve problems that have not been thoroughly defined. Strategic efforts focus heavily on asking stakeholders what problems must be solved and defining the value derived by meeting the goals. Developing a strategy first allows you to measure success in a tangible way to ensure you meet your objectives. In addition, when employees understand why they are being asked to do something, they generally respond more favorably when they know the vision of the project. - Governance
Governance takes Strategy down to the service level. Governance efforts define usage policies, guidelines, and rules for your solutions. A successful plan leverages Microsoft’s best practices, demonstrates how to use different services to meet the business objectives, and ensures there is ownership of critical requirements and processes.
Governance is critical because it requires that other parts of the business are engaged to ensure success. One of the most important aspects of governance is gaining traction with a group of stakeholders that will take ownership of the digital transformation process. And governance doesn’t stop — it requires regular meetings to discuss progress, collect feedback, and make changes to the governance plan, roadmap, and service offerings as technology and business needs change. - Architecture
Architecture focuses on the technical components of leveraging Office 365, including information architecture, taxonomy, metadata, branding, user experience, best practices, technology changes, application integration, and the continuous effort to ensure that all the pieces fit together correctly for your organization. - Training
Training isn’t one size fits all. It’s customized training in small doses on a regular basis in order to increase user understanding and adoption. Custom training combined with repetition increases user interaction and sends a message to the end users that your organization cares enough to ensure users have what they need to be effective.
- Administration
Administration components in Office 365 are different from classic on-premises platforms. The needs of patching, service packs, upgrades, and most of the routine maintenance activities are gone. However, many of those requirements have been replaced with new features and capabilities that should not be ignored. A successfully engaged administration plan will involve monitoring Microsoft messaging relating to tenant updates, changes, and outages. It’s not uncommon to see 15 or more messages per week relating to items affecting each Office 365 environment. - Support
Support includes defined service level agreements based on requirements of the business. If your organization needs 24×7, one-hour response time because it’s critical to the business objectives, then this must be considered. CoE resources must have deep understanding of the platform and capabilities. While no single person understands it all, it’s imperative that your organization’s support skills align with its intended use of Office 365. With user adoption, including from your support teams, this will grow organically. While all the service areas are important, this is the area to absolutely ensure the proper resources are in place. Most customer contact, feedback, and ideas are generated through support interaction. Proper support teams will have plans to collect feedback and present this information to the governance and architecture teams to continue the circle of improvement.
The Importance of Process
The real CoE magic happens when you have the right combination of pillars driven by a defined and ongoing process, supported by the right resources for each set of activities, all of which are set with the proper cadence.
Your CoE is like a puzzle. All your components should fit together to showcase your vision with a total solution.
Without some pillars (or pieces of the puzzle), you will find there will be a hole in your process. Depending on the size of your organization, the needs and complexity of the solution will vary, but all are necessary to a certain degree.
When your entire plan is working harmoniously, it demonstrates to the organization the capability of IT to deliver on the needs of the business. This builds internal trust, while spotlighting IT as a leader and innovator in your organization, versus positioning IT as a cost center. This is key to transform your internal end users’ impressions of IT of simply providing tools and services to one where IT provides full life-cycle solutions to business problems.
A Customer-Centric Approach
The difficulty with digital transformation is that it is 100% based on people and their ability and willingness to change how they operate. When all of the pillars of the CoE are executed and maintained, user adoption will increase. As adoption increases, the entire solution becomes self-sustaining.
There is a tipping point where existing users create most of the new demand for capabilities because of their reliance on these tools. Your CoE activities drive user adoption, which in turn, support your overall transformation efforts. You should see a few of these benefits across your organization as overall user adoption grows:
- Cultural shift from manual processes to automated technologies
- Increased efficiency from a work processing perspective
- Decreased reliance on email
- Streamlined communication, searchable communication
With a Center of Excellence approach, you will begin to see an increase in user awareness, engagement, adoption, and all of the measurable and tangible benefits of true digital transformation.
Secure Score is a service provided by Microsoft to give administrators a guideline of how to better secure their tenant. Think of it as a credit score for Office 365. Guideline tasks can vary from reviewing audit logs to enabling MFA on all user accounts.
In this article, we will address a specific secure score metric — Enable Client Rules Forwarding Block Advanced Action. We’d like to address this specifically, as the rules that Secure Score assist you in making do not work as intended and do not cover all bases when it comes to disabling the Auto Forwarding feature in Exchange Admin.
Exchange Admin – Mail Flow / Transport Rules
When using Secure Score and looking at the Enable Client Rules Forwarding Block Advanced Action metric, you will notice that they have an option to “Apply” a rule to your Exchange Admin Center.
The rule that Microsoft creates attempts to filter messages that are received internally and block them if they have the type of “Auto-Forward” and are sent to an external organization. The purpose of this rule is to minimize the possibility of sensitive information leaving your organization (especially without you knowing it).
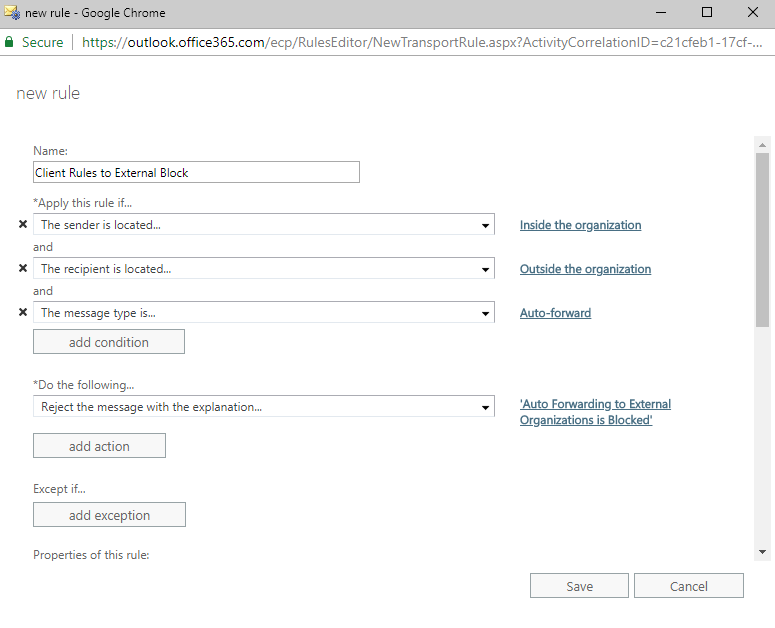
There are a few issues with this rule.
For one, this rule only blocks auto-forwarding if the message was sent from someone inside your organization and you auto-forward it outside. This means that someone could send your users a message from outside the tenant, and it will successfully auto-forward outside the tenant again.
To solve this issue, we need to have two rules instead of one: one that blocks auto-forwarding if the message was received internally and sent externally and one that was received externally and sent externally.
The second issue is that the rule attempts to pick up on the type of “Auto-forward”, but it does not seem to work. In this case, we found that a unique header can be used to block these messages successfully.
Filtering messages based on the “X-MS-Exchange-Generated-Message-Source” header for a result that includes “Mailbox Rules Agent” will successfully block auto-forwarded messages.
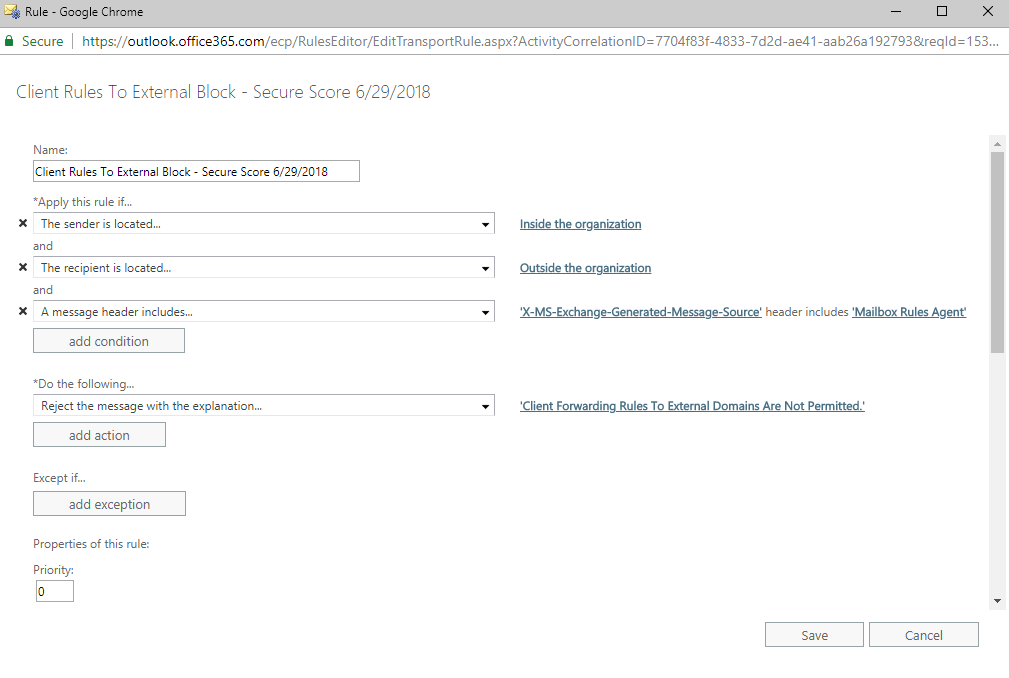
The rule above takes care of blocking messages received internally and sent externally. The following rule takes care of blocking messages received externally and sent externally.
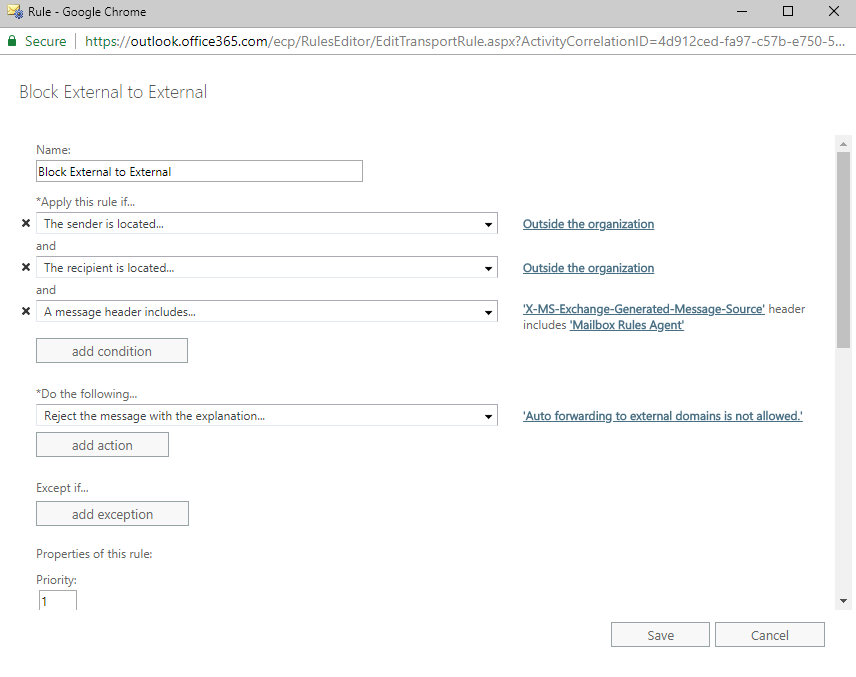
Now that these two rules are set up, we should be successfully blocking auto-forwarding to external organizations. However, there is one more step we need to take to complete this process.
Auto-forwarding in Office Web Apps
Unfortunately, a user will still be able to successfully auto-forward messages if they set up auto-forwarding within OWA in their settings (as shown below).
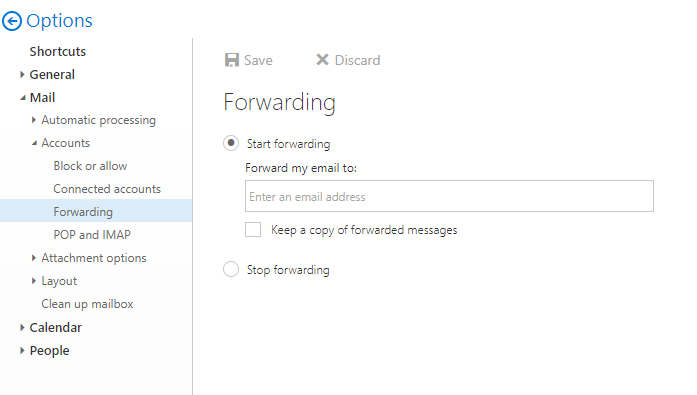
The mail flow rules only filter out messages that are set up using Inbox Rules. To disable the ability to auto-forward in OWA we need to head over to the “Remote Domains” section in Exchange Admin.
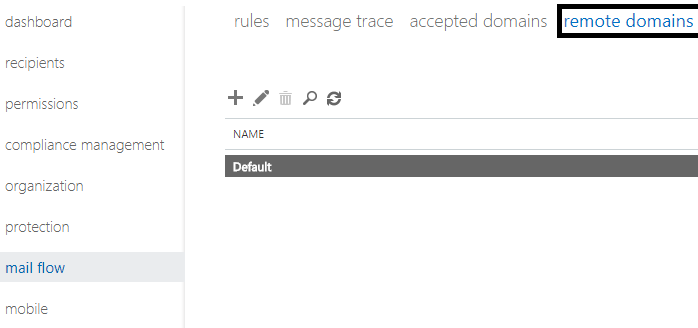
Once there, edit the Default policy and uncheck the box for “Allow automatic forwarding”.
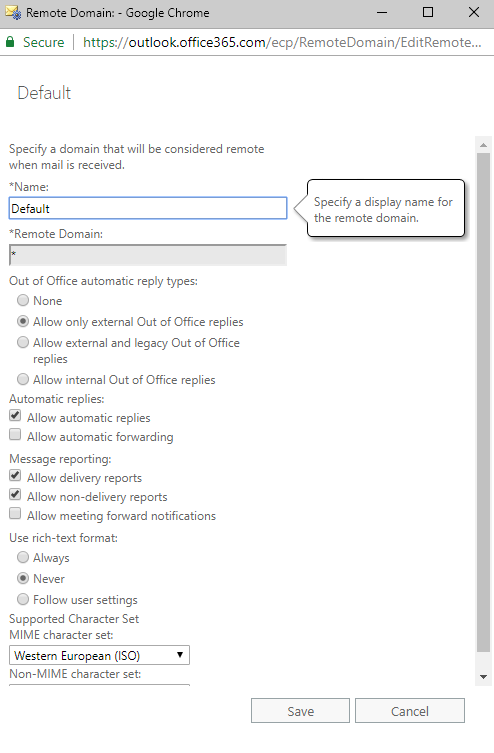
Save your changes, and you should be all set for blocking all automatic-forwarding to external organizations!