Microsoft 365
Balancing Security and Productivity in Microsoft 365 During Times of Crisis – Part 3

In the second blog of this series, we discussed how Access Reviews in Azure Active Directory (Azure AD) provides a guided review of a group of Microsoft 365 users to help determine if their continued access to tenant resources is required. The third and final tool designed to control and audit access to company resources is Privileged Identity Management (PIM). PIM works synergistically with the other tools to help keep a watchful eye on the collaboration space without impeding productivity.
In Part 3, we’ll discuss PIM in detail. This tool is designed to provide just-in-time escalation of permissions to ensure higher permission levels are only available when needed and can be applied with governance in mind.
Privileged Identity Management
Setting up Privileged Identity Management
PIM is designed to support a “least privileged” model by making granular roles available to users requiring elevated functionality. In addition, users with continuous excessive access are vulnerable in the event their account is compromised, so when not-needed users’ accounts have no extraneous permissions. When needed, a user simply requests elevation into a specific role that has been made available to them. Depending on configuration, the assignment is either automatic or requires approval and/or justification.
The first step in configuring PIM is selecting which roles should be available under which circumstances. This configuration is found under Identity Governance, in the Manage section, by selecting Roles. The Roles screen presents a large list of Roles along with a Description of the Role’s intended usage. The screen will also display how many users are currently Active in a Role and how many users are eligible to be activated in the role.
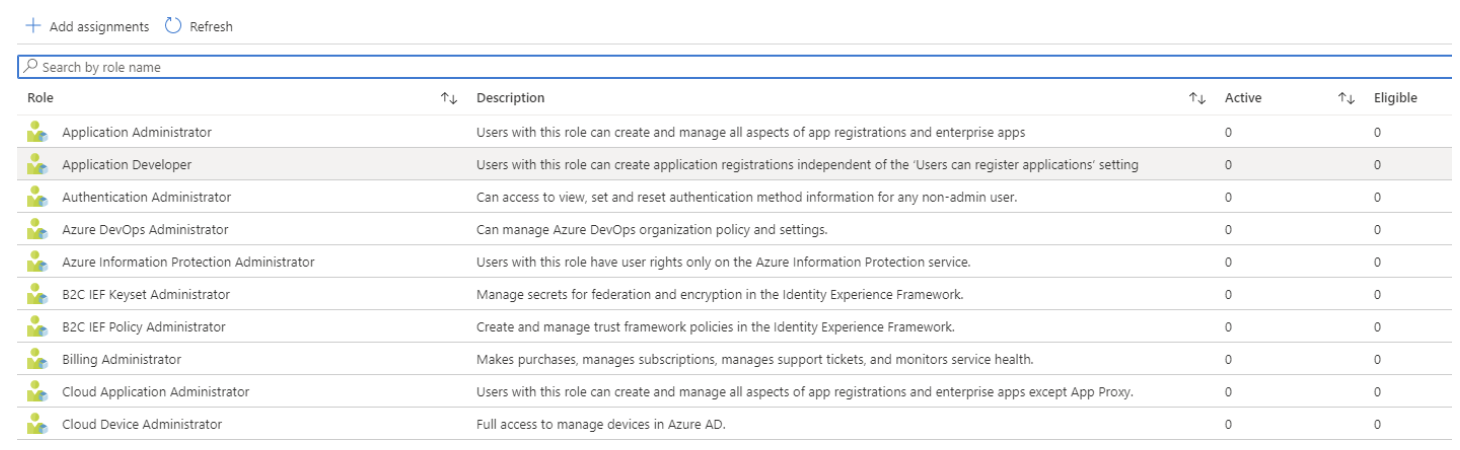
For example, suppose you want to allow an Administrative Assistant to occasionally reset passwords without involving a tenant Global Administrator. To set this up, click on the Helpdesk Administrator Role in the list, or use the search to filter the list. Selecting this Role will list all current assignments for that Role, including Eligible, Active, and Expired. Pressing the “Add assignments” button will begin the process.

The first screen will show you the Role you have selected, with a link to select member(s) to assign to the role. Pressing the hyperlink under the Select member(s) will bring you to a search for all users within your tenant.
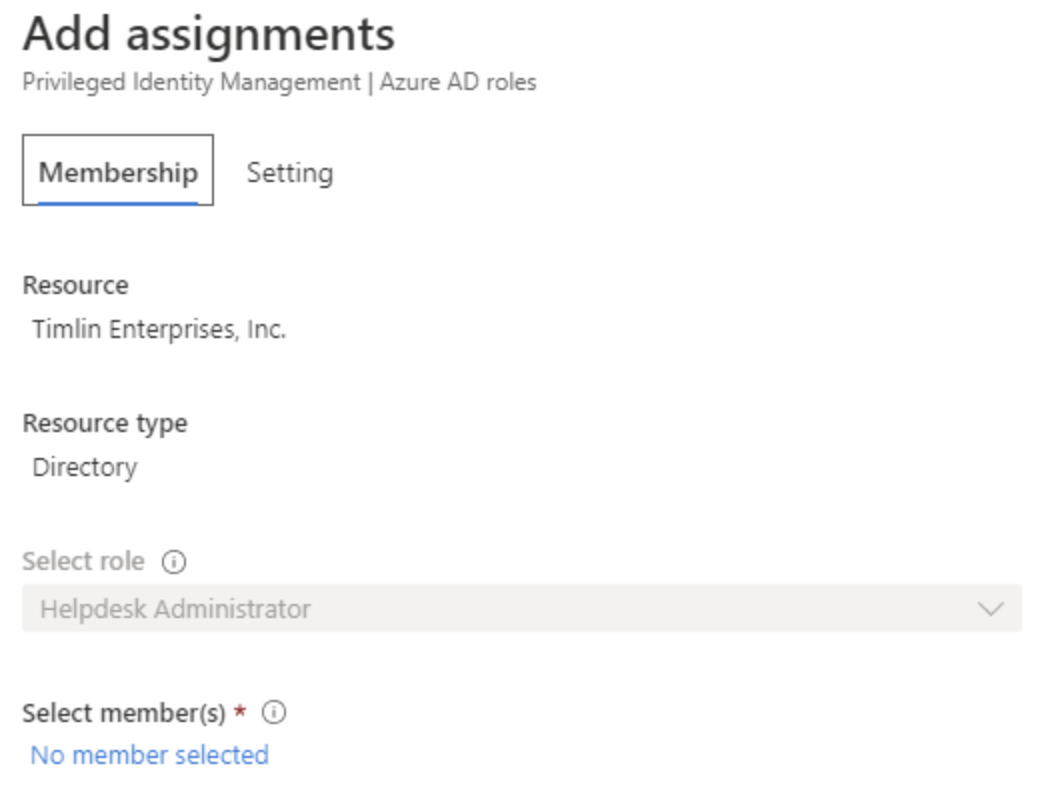
Select the user and press the Select button to add them to the list of members eligible for the Role. Selecting Next navigates to the Settings section, where you determine the Assignment type and durations. Leaving the type Eligible will require the user to request elevation when needed, which is the intention in this case. If you want the assignment to be limited in duration, such as covering an employee who is on leave or vacation, you can set dates for the start and end of the assignment by un-checking Permanently eligible and select dates. Selecting Assign will move that assignment into the Eligible list.

Additional settings can be applied to the Role by selecting the Settings button at the top of the Assignments screen for the Role.

From this screen, there are many configuration options to allow for more granular control of how the escalation process is executed, including approval and notification options.
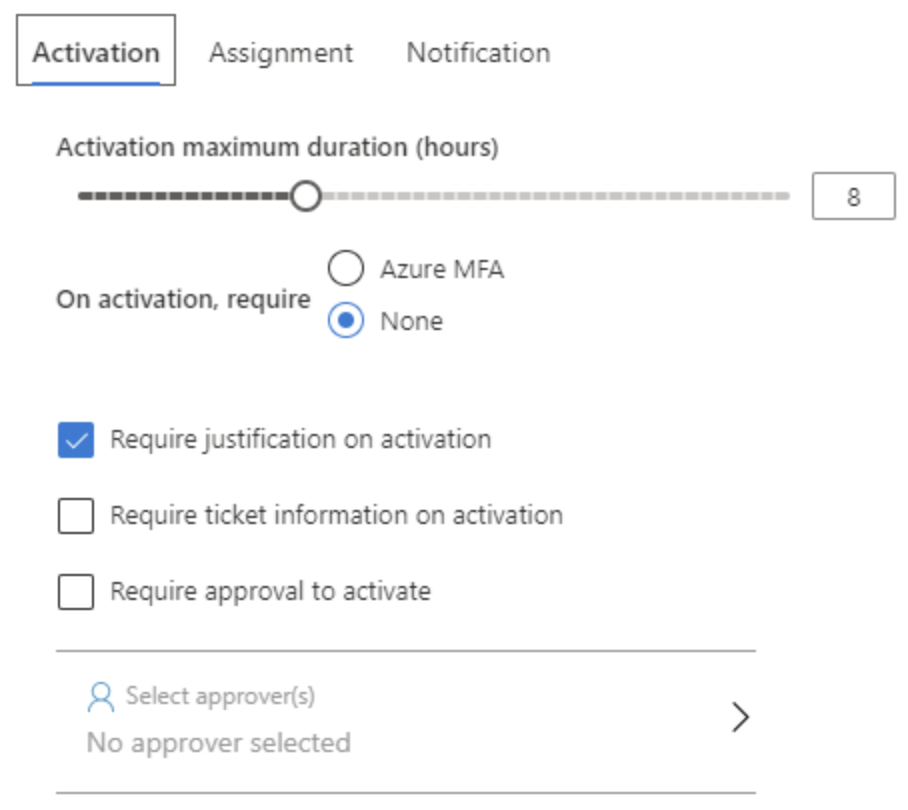
The first section covers the Activation process itself. Here you can set a maximum duration for the escalation, require Azure MFA, justification, ticket information, or even approval. If requiring approval, you can select who provides the approval from this screen as well.
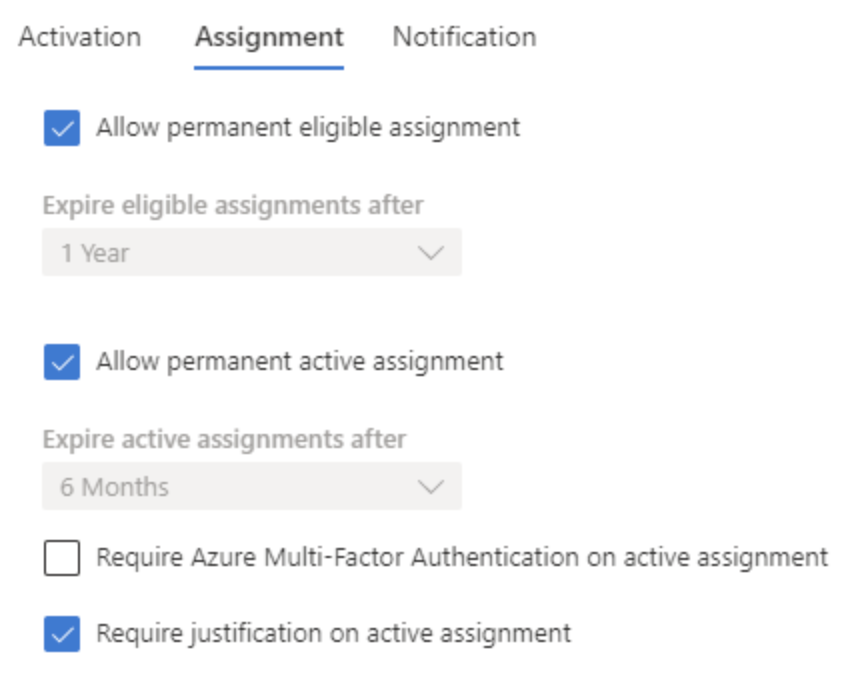
The next section covers Assignment, where you can decide if permanent Eligible assignments are allowed, permanent Active assignments, and whether justification and/or MFA is required for Active assignments.
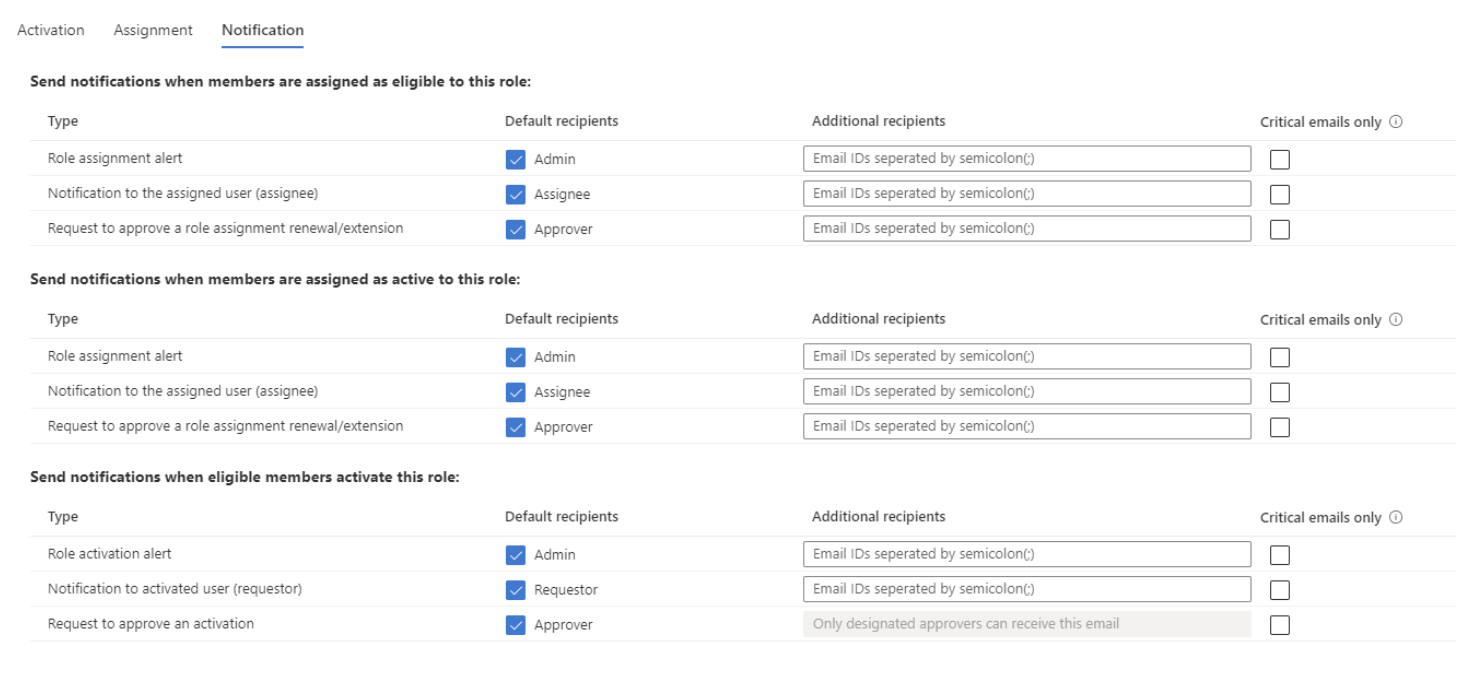
The final section provides rich configuration for Notifications to be sent regarding this process. Notifications can be enabled for when members are assigned eligible to the role, when they are assigned as Active to the role, and when eligible members activate the role. This last alert would trigger when escalation has occurred. Each section of notification includes three options: Role activation, Notification to requestor, and request for approval. All of these options are enabled by default, with default recipients being Admin, Requestor/assignee, and Approver. Additional recipients can be added for most notifications.
Requesting Elevation
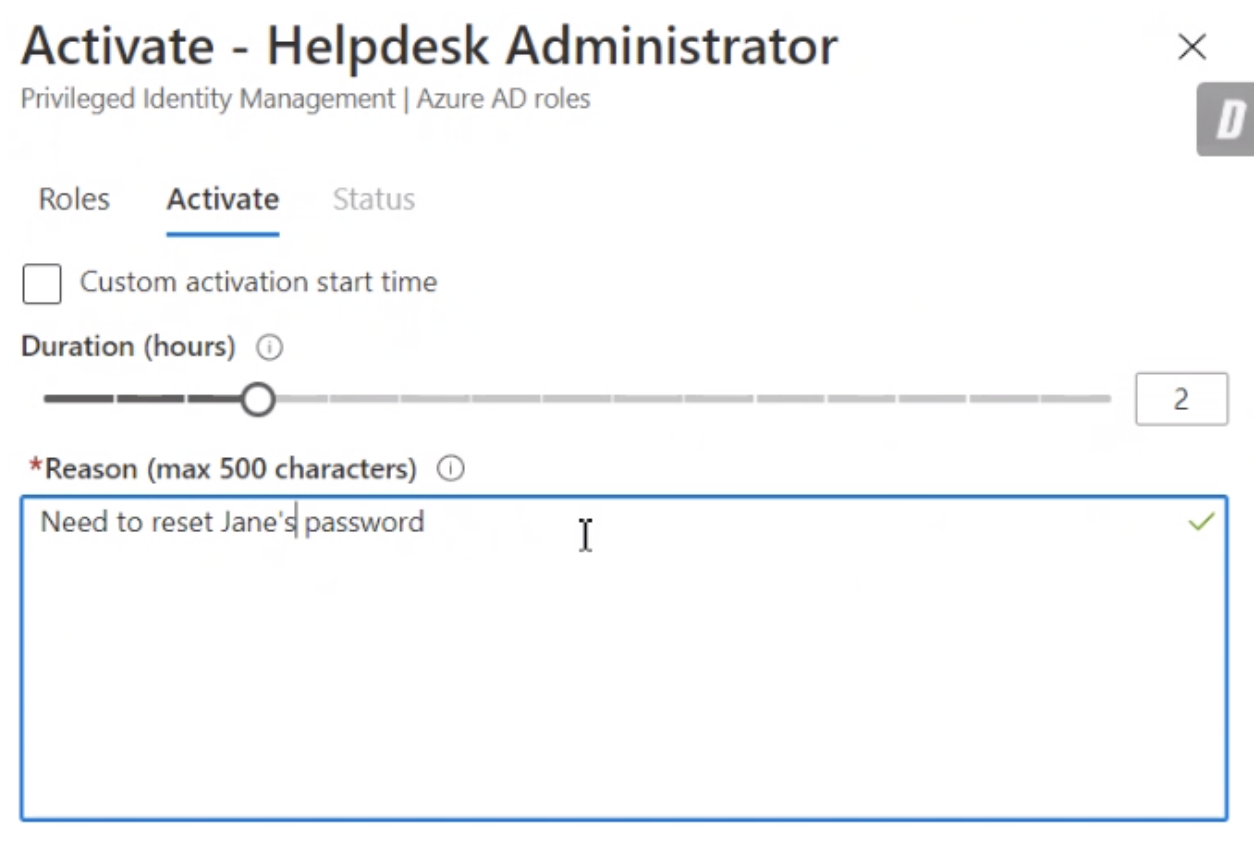
Once a role is configured to be available, a user can request escalation by going to Azure AD, navigating to the Identity Governance screen, and selecting “Activate Just In Time”. There, they will see all Roles for which they are eligible, and have the opportunity to request being assigned to that role. Pressing Activate will start the process to be added to the role.

Depending on configuration there may be approval and / or justification needed for the assignment to be completed. They can also set a Duration, up to the configured maximum, for how long the assignment should be in effect.
Once completed, they will be in the Active roles section until the duration has been met, or they manually Deactivate the assignment.

Summary
Privileged Identity Management in Azure AD Identity Governance provides just-in-time elevation to targeted roles, helping to protect users’ accounts during normal usage, but providing an easy, governed method of escalating privileges when needed. As with the other facets of Identity Governance, PIM provides a healthy balance of productivity and security within the Microsoft 365 platform.